
I missed out on adding a dragonfly stamp set and dies, offered by Stampin’ Up!, a couple of years ago. As a result, when the Dragonfly Garden Bundle became available, it was high on my wishlist! It’s part of an awesome suite that’s called Dandy Garden Suite, in the January to June 2021 Mini Catalog. This includes flowers, dragonflies & ladybugs! So, let’s make some cards with all three, then step it up along the way.
Since my husband and I returned from our second trip to Georgia, we are slowly working ourselves back into a routine, again. My creative mojo is also beginning to return. And like so many other paper crafters, we rely on fellow crafters to help when this happens. Recently, Stampin’ Up! gave the demonstrators a “step it up” idea using the dragonfly stamps, punch and coordinating Designer Series Paper (DSP). I CASE’d (Copy And Share Everything) this idea.
Here’s “Lori’s version” and how these cards were made.
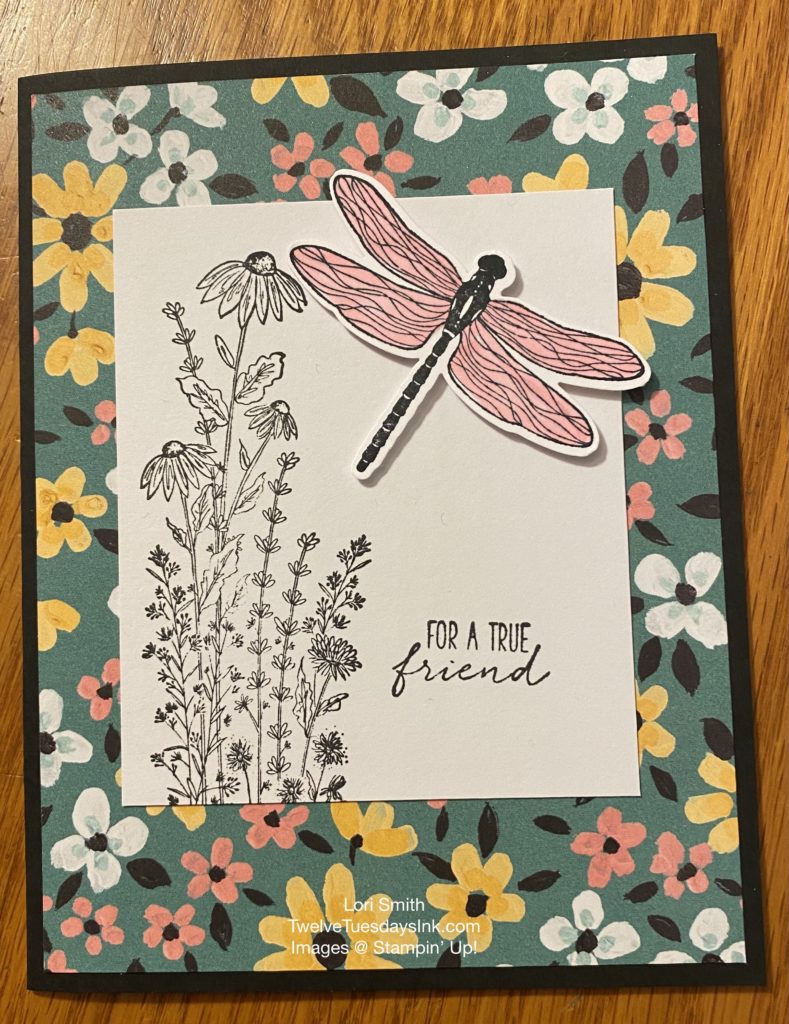
Start with Flowers – Card #1
- Begin by picking a flower patterned Designer Series Paper (DSP). I chose DSP from the 2021 Sale-a-bration. Then, follow the color combinations from the paper for the rest of the card.
- Make a card base by cutting a 5-1/2″ x 8-1/2″ piece of cardstock and scoring down the middle at 4-1/4,” then fold in half.
- Cut a piece of DSP for the card front that measures 5-1/4″ x 4.” Adhere it with runner tape or liquid glue.
- Stamp flowers and sentiment onto a 3″ x 3-1/2″ piece of white cardstock, as shown. I used Tuxedo Black Memento Ink.
- Adhere this piece to center of the DSP, on the front of the card, as shown above (far left).
Add a Dragonfly
- Create the dragonfly by stamping the image on another piece of white cardstock with the black ink, then punch it out using the Dragonflies punch.
- Color the wings using one color of coordinating Stampin’ Blends Combo pack or colored pencils. I chose Flirty Flamingo for mine.
- Add two Stampin’ Dimensionals to the back of the dragonfly and stick it in the upper right corner of the white cardstock, above the sentiment. Then, finish the inside of your card as you wish.
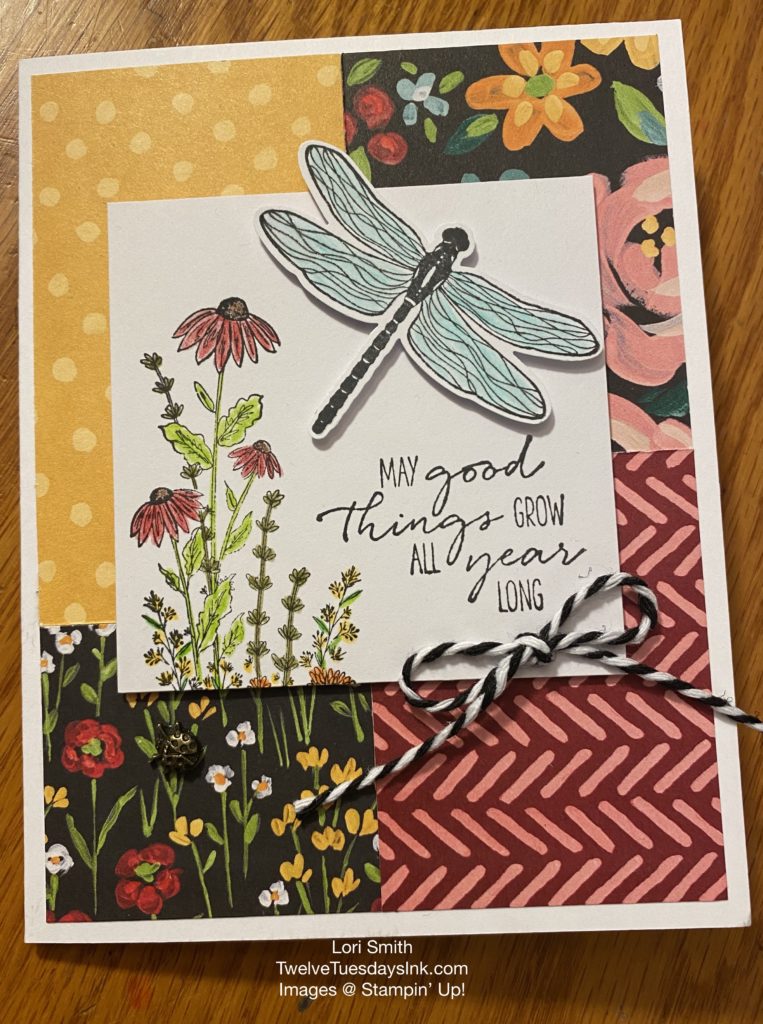
Fancier Flowers – Card #2
- Pick another piece of flower DSP, cut to measure 5-1/4″ x 4,” and make a second cut down the middle, to create two strips measuring 2″ x 5-1/4″ each.
- Make another card base, as directed above.
- Adhere one DSP strip to the card front, as shown in Card #2 (middle) above.
- Turn the second DSP strip over, to reveal the other side of the DSP, before gluing this strip to the card front.
- Cut a piece of white cardstock to stamp flowers and sentiment, on.
- Add some color to the stamped flowers and leaves with Stampin’ Blends Combo pens, or use colored pencils. Then adhere to the center of card front.
- Make the dragonfly, color and adhere, same as card #1.
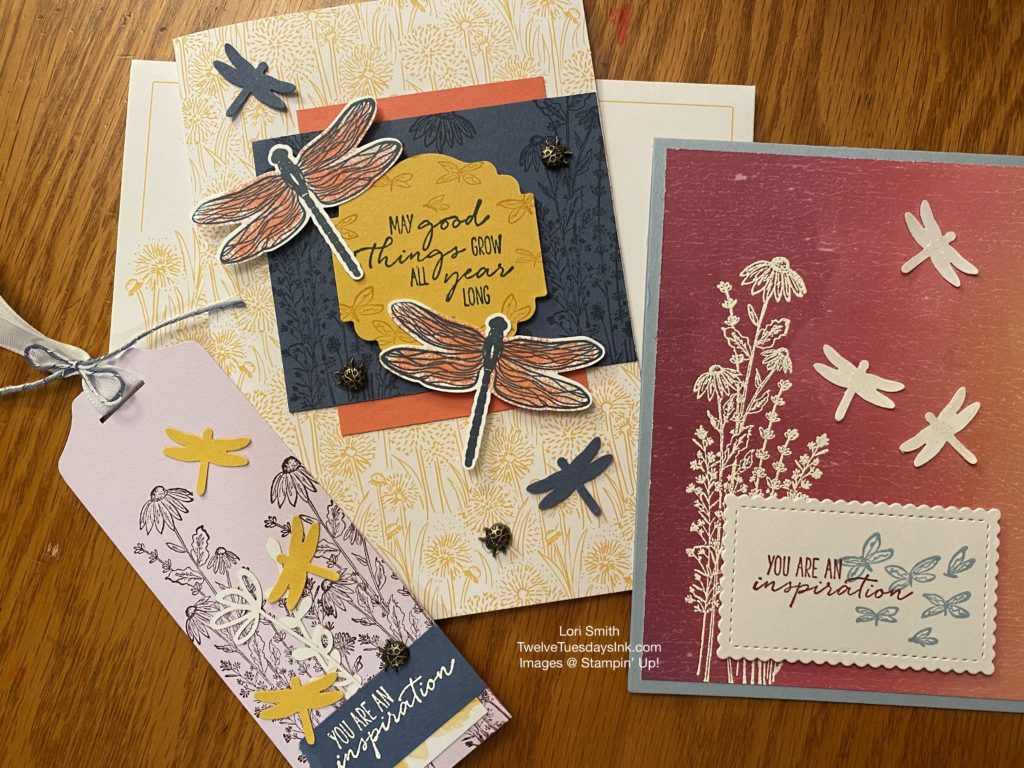
A Ladybug Touch – Card #3
- Begin this card by picking two 2″ x 5-1/4″ strips of flower DSP. Cut both strips, to make four pieces. Turn the strips lengthwise, cut at 1-3/4.” You want two pieces that measure 2″ x 1-3/4,” and two pieces that measure 2″ x 3-1/2″ when done.
- Make a card base, the same as for the other two cards.
- Adhere the four pieces of DSP to your card front as shown in Card #3 (far right) above.
- Cut the piece of white cardstock and stamp flowers and sentiment, then color as desired. Adhere the white piece with Stampin’ Dimensionals.
- Make a dragonfly, color wings, then give the wings sparkle by brushing on Wink of Stella. Then pop-up with dimensionals.
- Embellish the card with a ladybug. Mini glue dots are the perfect size to make her stick to the card. Also, add a bow, if desired.
More CASE’s
The Stampin’ Up! catalog is always an excellent source for my inspiration when I can’t seem to get my mojo started. I made some of these ideas that caught my eye.
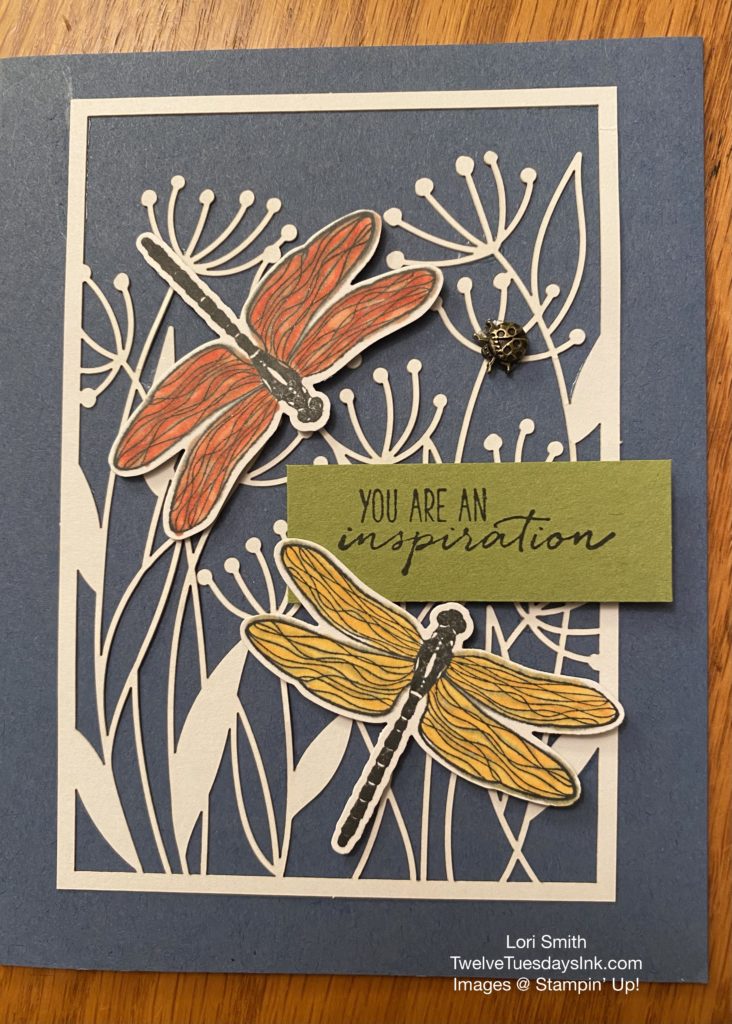
Flowers, Dragonflies & Ladybugs are Optional!
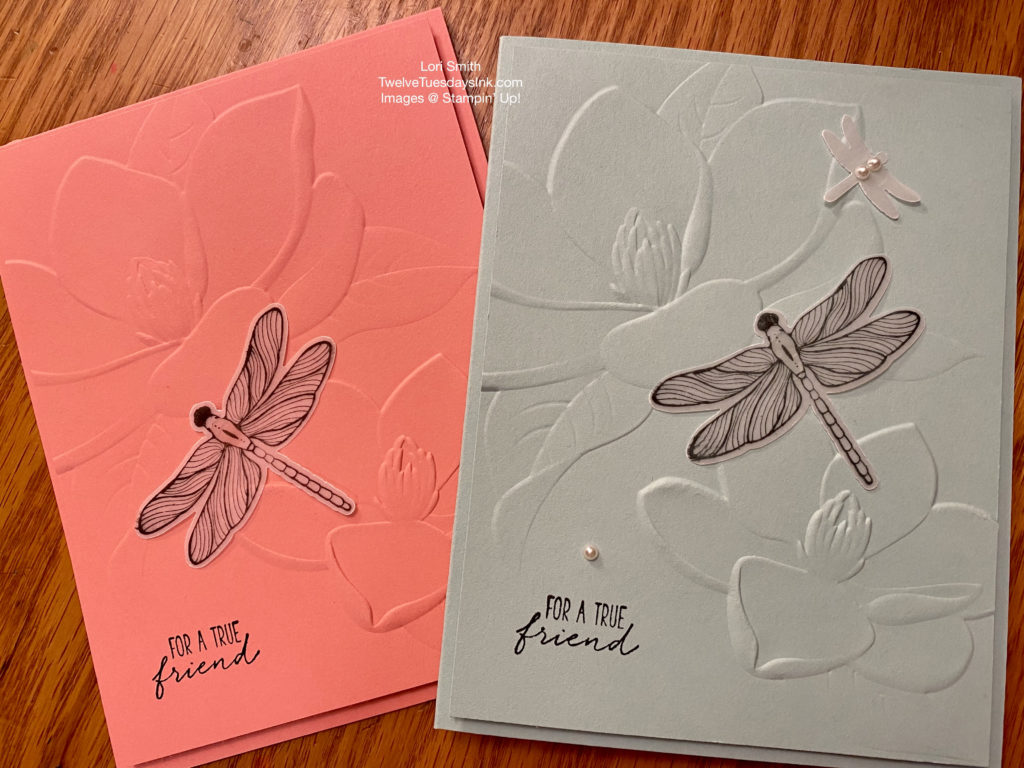
Here’s a card idea I woke up with this morning, so I had to try it out! When we were in Georgia, one morning I joined my In-laws and my husband to go fishing on a beautiful lake. Now, I am not a fisherman, by any means, but I sure do enjoy being outside. These cards are inspired by the dragonflies that were enjoying the lake water as much as I was. Now, the flowers in the Magnolia 3D embossing folder have always reminded me of waterlilies, so pretend with me. . . Smile! These two cards are made with Flirty Flamingo and Pool Party cardstock, and the dragonflies are stamped on vellum. I’m still debating about whether to add a ladybug to the Flirty Flamingo card, though, right between the bottom flower and friend. What do you think?
I’m feeling my mojo is starting to return!
Flowers, Dragonflies & Ladybugs Featured Products
Select the item number to view and learn more about the products used for these cards. Some of them will not available after June 30, 2021, so if you are thinking about adding these products to your stash, do it soon!
- Dragonfly Garden Bundle, item # 156224
- Dandy Laser-Cut Paper, item # 154300
- Dandy Garden Memories & More Cards & Envelopes, item # 154301
- Ladybug Trinkets, item # 154299
- Playful Pets Trim Combo Pack, item # 152466
- Flowers for Every Season Ribbon Combo Pack, item # 153620
- Tuxedo Black Memento Ink, item # 132708
- Watercolor Pencils Assortment 1, item # 141709
- Watercolor Pencils Assortment 2, item # 149014
- Flirty Flamingo Stampin’ Blends, item # 154884
- Daffodil Delight Stampin’ Blends, item # 154883
- Pool Party Stampin’ Blends, item # 154894
- Vellum, item # 101856
- Pearl Basic Jewels, item # 144219
- Magnolia 3D embossing folder, item # 149579
Other Items in the Dandy Garden Suite
These next item #s will not be available after June 30,2021. Hurry, if you’d like to order these!
- Garden Wishes bundle, item # 156220
- Dandy Garden Memories & More Card Pack, item # 154302
- Mossy Meadow 3/16″ Braided Linen Trim, item # 154298
- Dandy Garden 6″ x 6″ DSP, item # 154297
I’ll be crafting with a few other retiring items from the January to June 2021 Mini Catalog soon, so stay tuned.
Thank you for visiting Flowers, Dragonflies & Ladybugs, today!!
Beautiful cards, Lori. You are such an inspiration for us. Thank you!
Thank you for your encouragement!