
Over my time as a Stampin’ Up! demonstrator, I can’t always remember the stamping products I’ve presented in the past months. I prefer to introduce some “new to the group” items or techniques, because we all have different tastes and styles when paper crafting. To help me along this journey, a number of years back, I decided to create a keepsake journal.
Keepsake Journal Tradition
This is my fifth year creating a keepsake journal, so I guess it’s become a tradition. Every year, I look forward to picking out some designer series paper, the color scheme, etc. The process gives me a chance to use up papers, ribbons, and embellishments that have retired. Also, I get inspired to mix past and current products in a way I wouldn’t normally get an opportunity to mix and even get a little corny, if I choose.

Since it is my fifth year of creating a keepsake journal, and I thought it time to share how I make one.
Make a Journal
First Steps
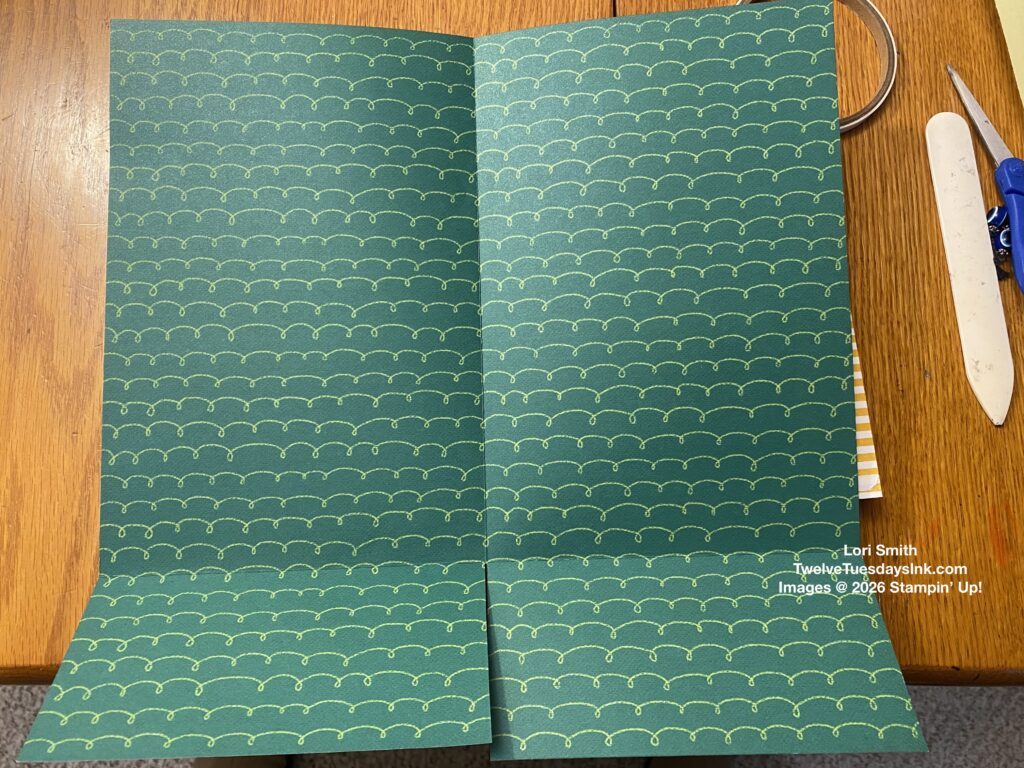
The type of keepsake journal I create uses retired 12″ x 12″ Designer Series Papers, whether the DSP comes from the same pack or coordinating papers from different packs.The first steps I take to make my journal involves several decisions:
- How many pages does the journal need? I usually have an idea how many projects I will demonstrate for the year, and then make sure I have room for a couple extra, or so. This year, I believe, I have 16 pages total.
- What papers do I want to pick that coordinate? Based on the number of pages I plan to make, I choose the DSP. All my papers for this journal come from the same DSP pack.
- Which ribbons, embellishments and coordinating card stock do I already have that compliments the DSP? Not all the ribbons, embellishment, etc., I use have retired in the same year. I feel this is part of charm and creative process.
I arrange the DSP in the order I’d like the pages to appear, and then I begin scoring the papers. Take to mind the direction of designs on the DSP before scoring. Score the DSP down the middle at 6,” then turn the page a quarter turn and score at 3.” This three inch score line creates the pocket. Lastly, cut a slit between the two pockets to keep the paper from buckling between the pockets when the journal is closed.
Second Step
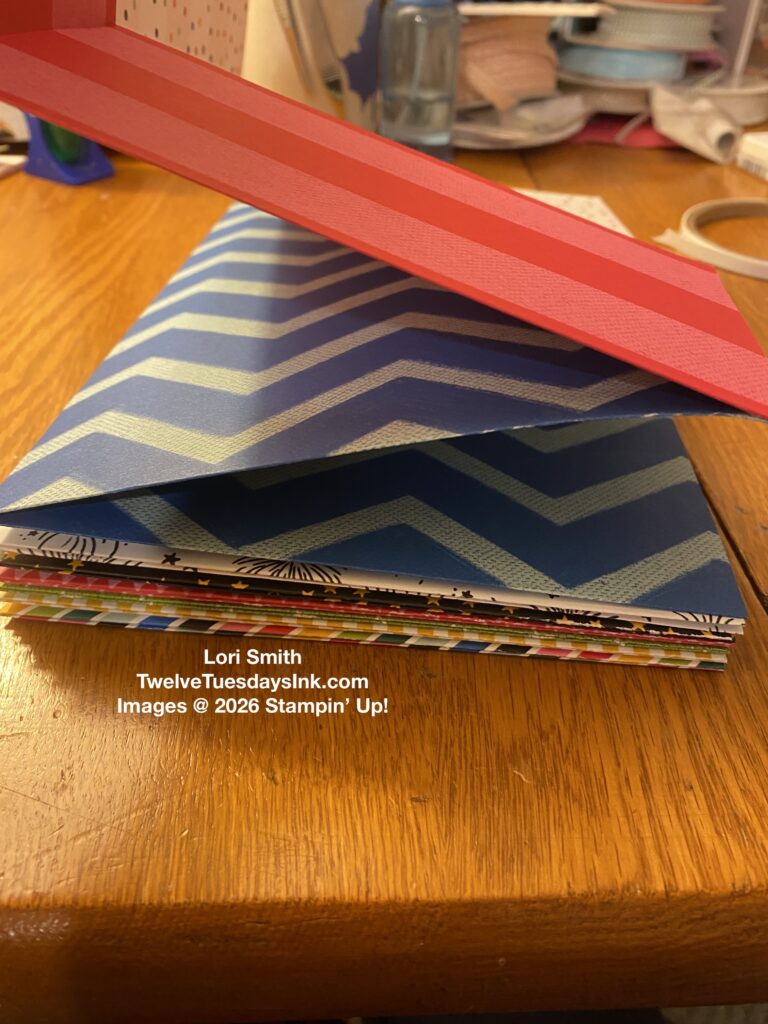
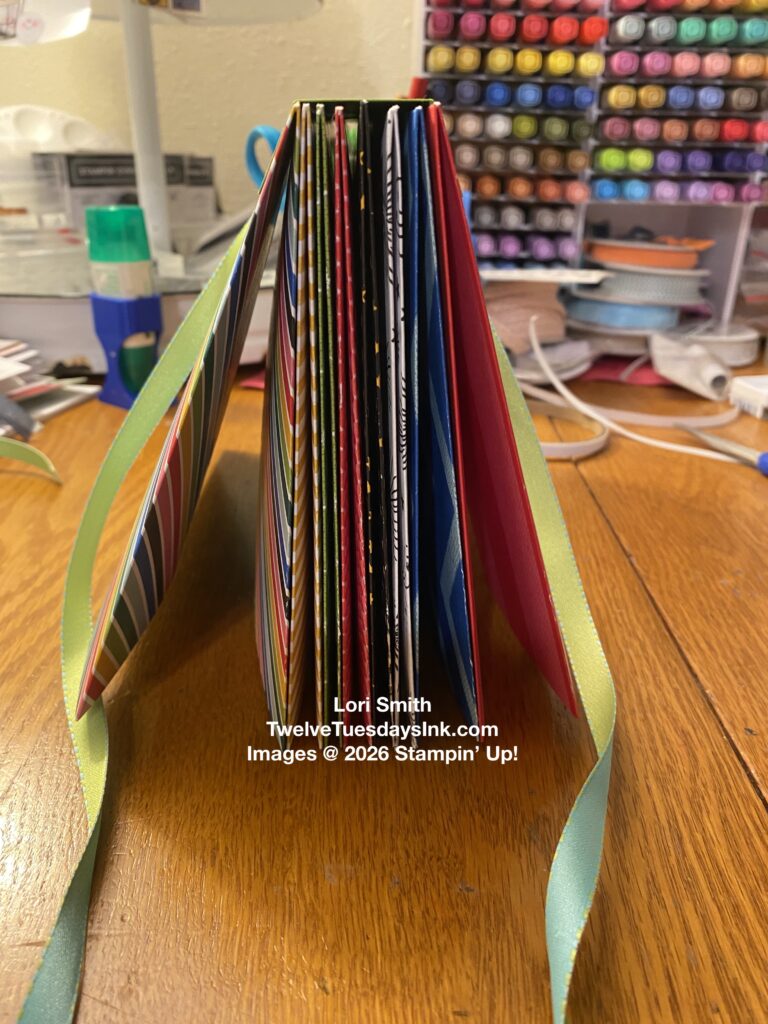
Once I’ve stacked all the pages in my chosen order, I begin taping the pages together. Use Tear & Tape and start adhering the tape behind the second pocket (aka page 2). Peel the protective paper off the tape and align page two to page three. Continue adhering tape to the fourth pocket (aka page 4) and stick it to page five. Repeat the process for the remaining pages. Obviously, you don’t want to adhere to the last page. Otherwise, your journal will stick to everything! When you’re all finished, takes on a zigzag (Z-fold) appearance. The spine should still be loose.

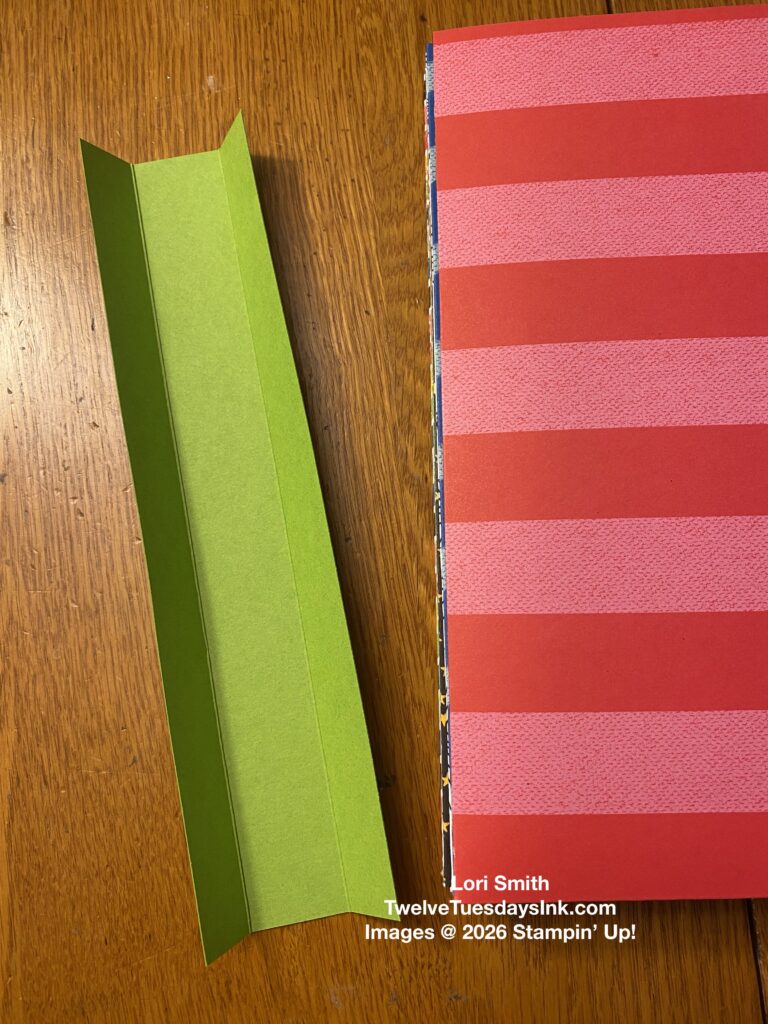
Create the Keepsake Journal Spine
Creating the spine is probably the most challenging part of this whole process. I like to use thick card stock for this, because it holds up petter over time. Sometimes, the spine of my journal is 9″ long, but this year it so happened that I had one 8-1/2″ length of Granny Apple Green card stock, that was just the right width, 2-1/2.”
Yes, you read it correctly. I measure my folded DSP, without compressing the pages, then rounded up the measurement to be one.” Some years, when there are only two demonstrators providing projects for our stamp group, my journal spine might be 1-1/4″ deep, because I plan for more pages. Once I have the depth figured out, I add 3/4″ on each side to attach to the front and back pages.
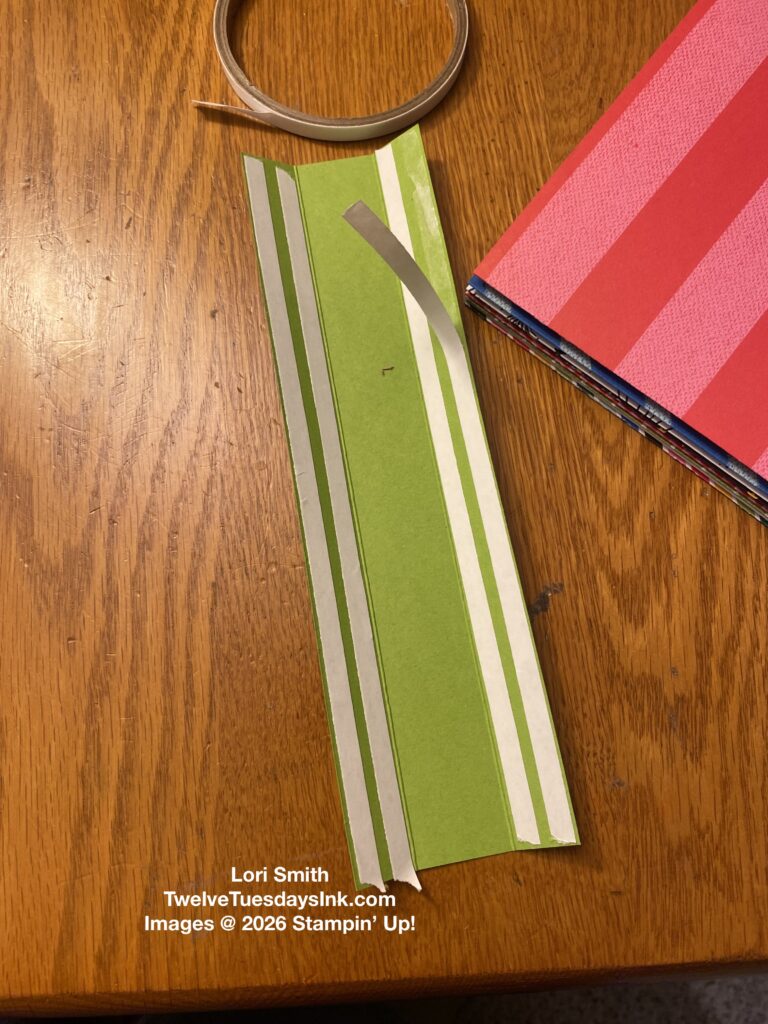
- Score at 3/4″ on each long side of the card stock.
- Adhere a couple strips of Tear ” Tape to each 3/4″ area.
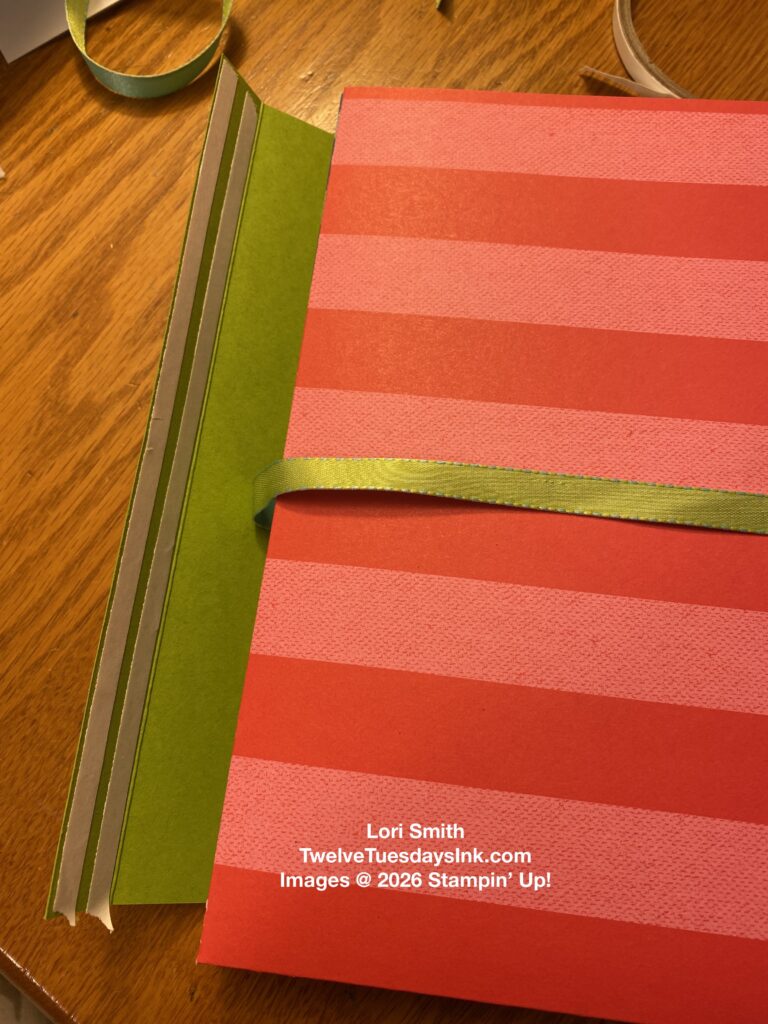
- Cut a length of ribbon long enough to tie the journal as desired. The length I cut my ribbon is approximately 40.” Loosely wrap the ribbon around the journal pages, but do not adhere anything.
- Peel the protective paper off the two tape strips for the back page. Position the ribbon in the desired location. Carefully align the back portion card stock to the back page, by sandwiching ribbon between the back page and spine paper.
- Peel the protective papers off the last two strips of tape. Align the front of the ribbon to the back ribbon and stick the ribbon to the exposed tape.
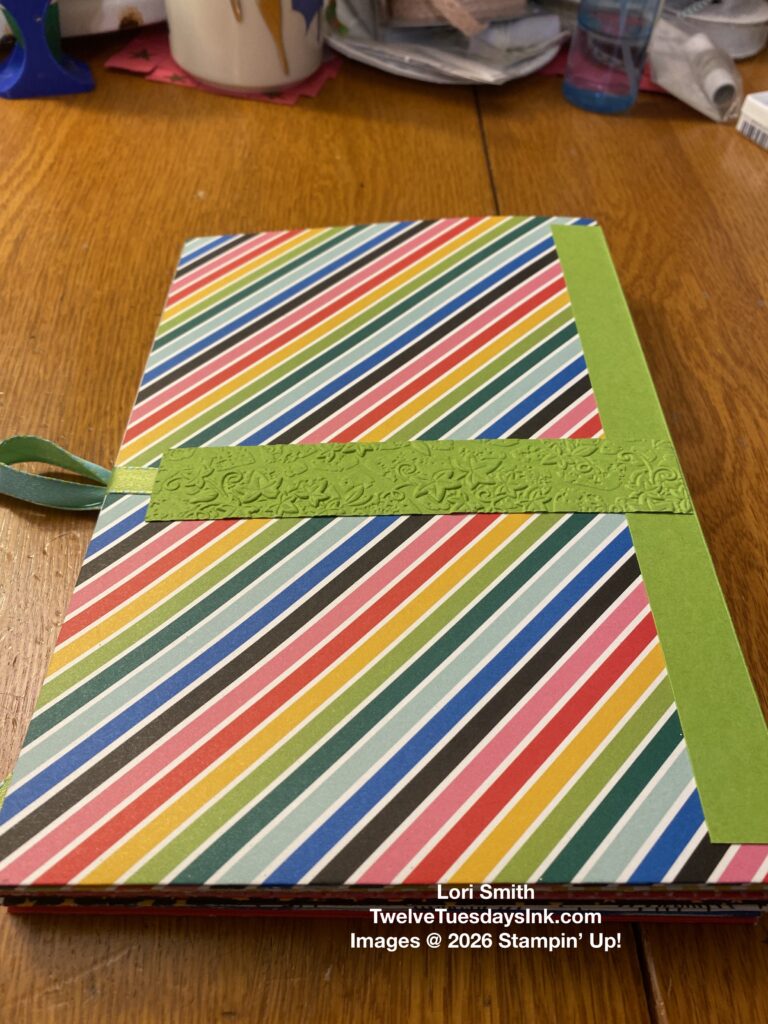
- Pull page one of the DSP to the front score line. Adhere the tape to the first page. Focus on the circled area, below.

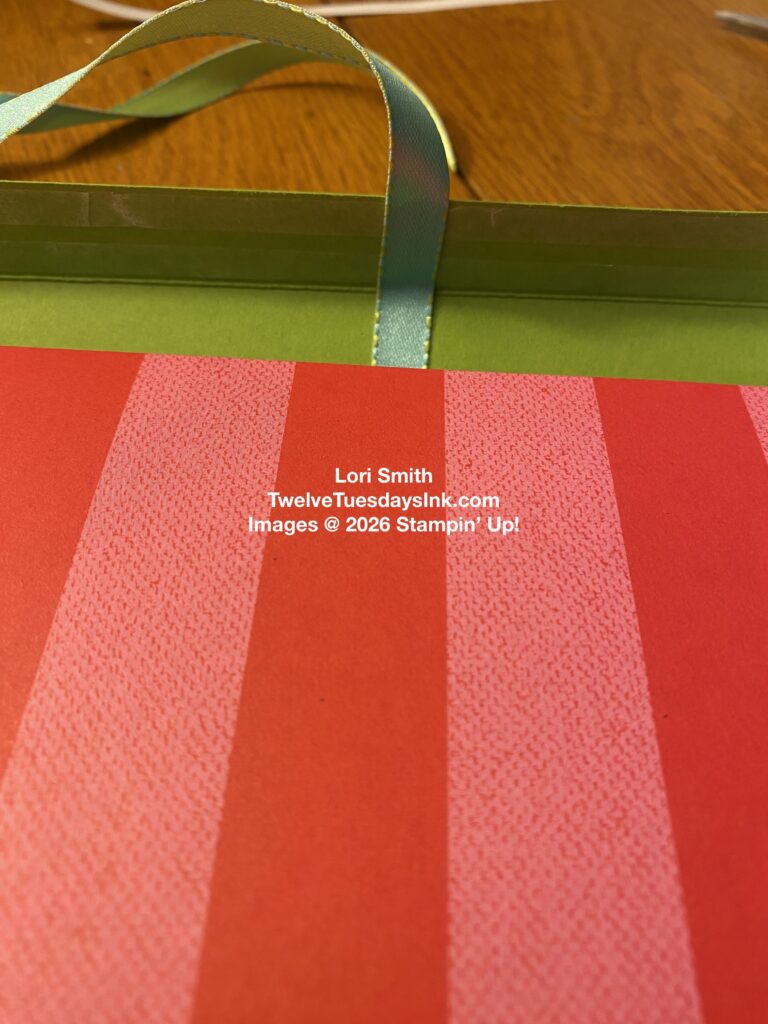
Journal Spine View
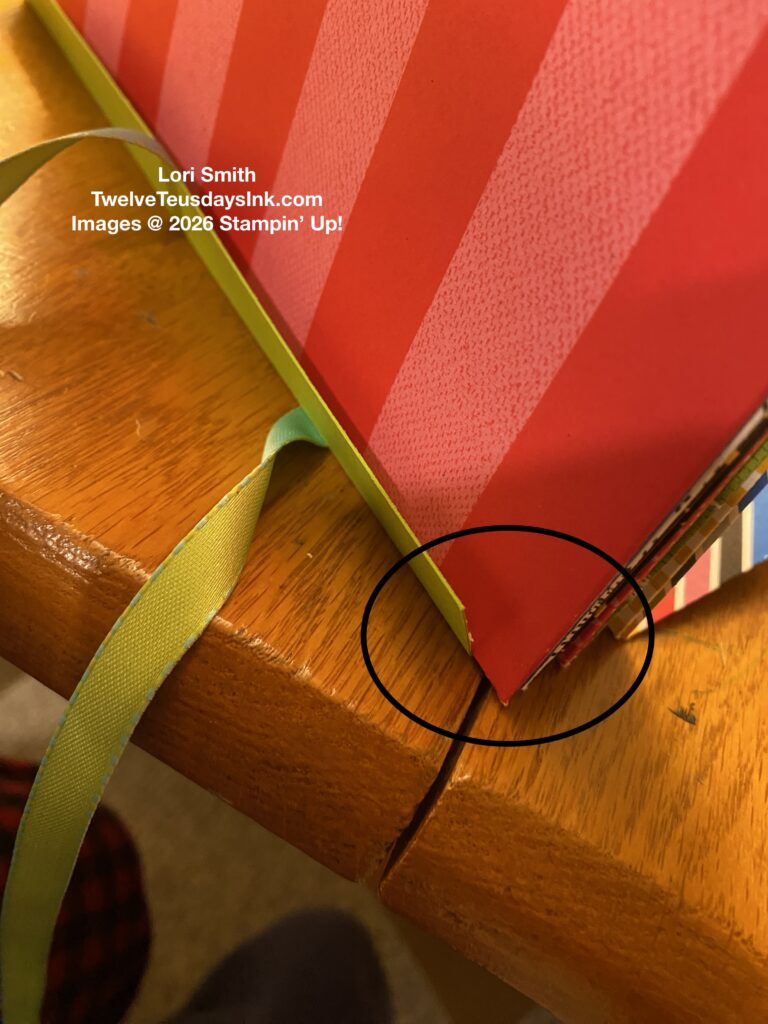
With your focus on step 6, above, the photo below demonstrates the gap in the spine. This gap is very important to allow for the journal pockets bulk, as it fills with keepsakes.
Below is another view of how the pages relax into the spine, while it is unfilled. Notice how the ribbons is loose on the front and back, yet.
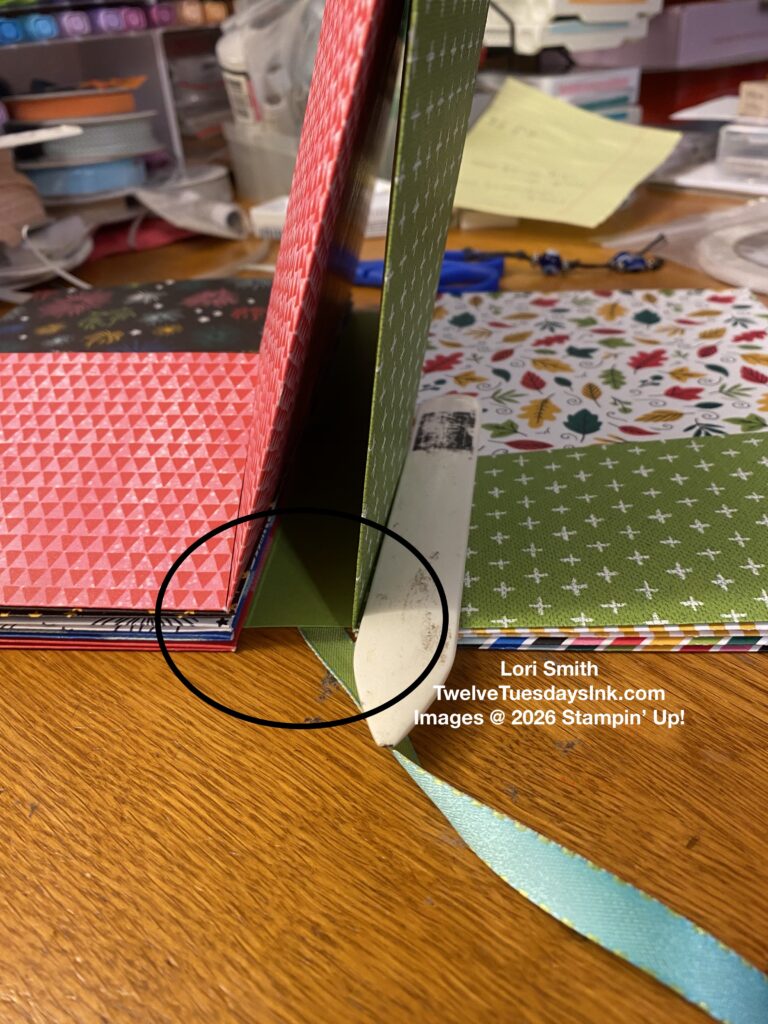
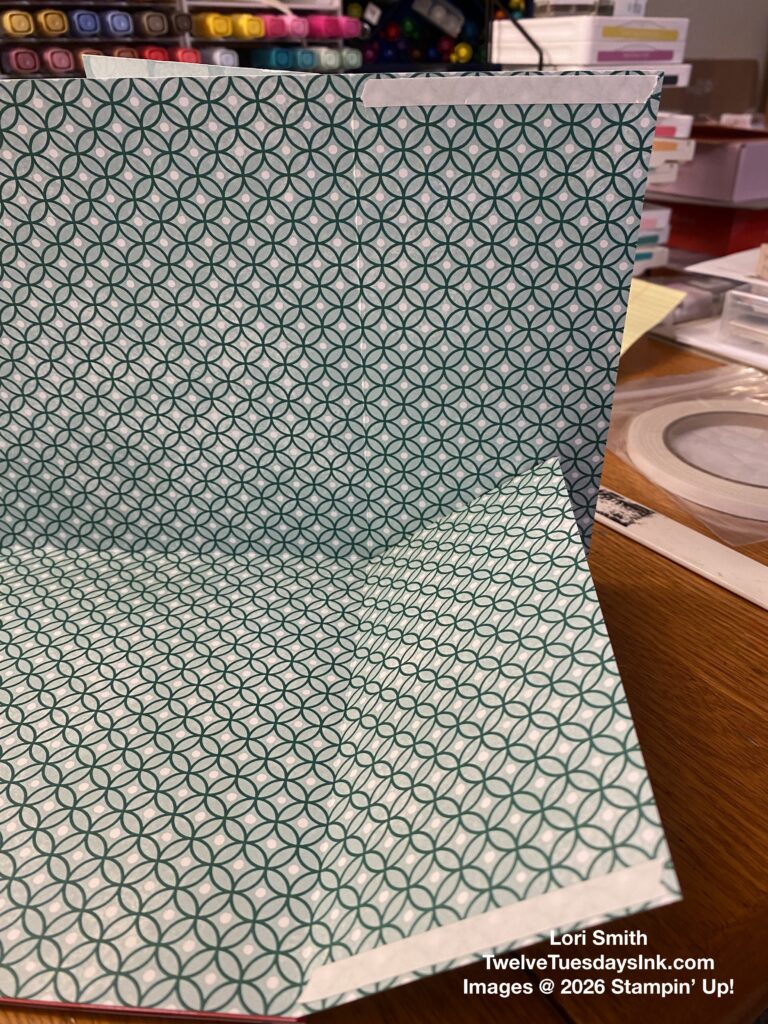
Complete the Pockets Inside
With pages and spine together, begin securing the pockets. Get out your tear & tape again. This time adhere the tape strips to the outsides of each pocket, as shown below.
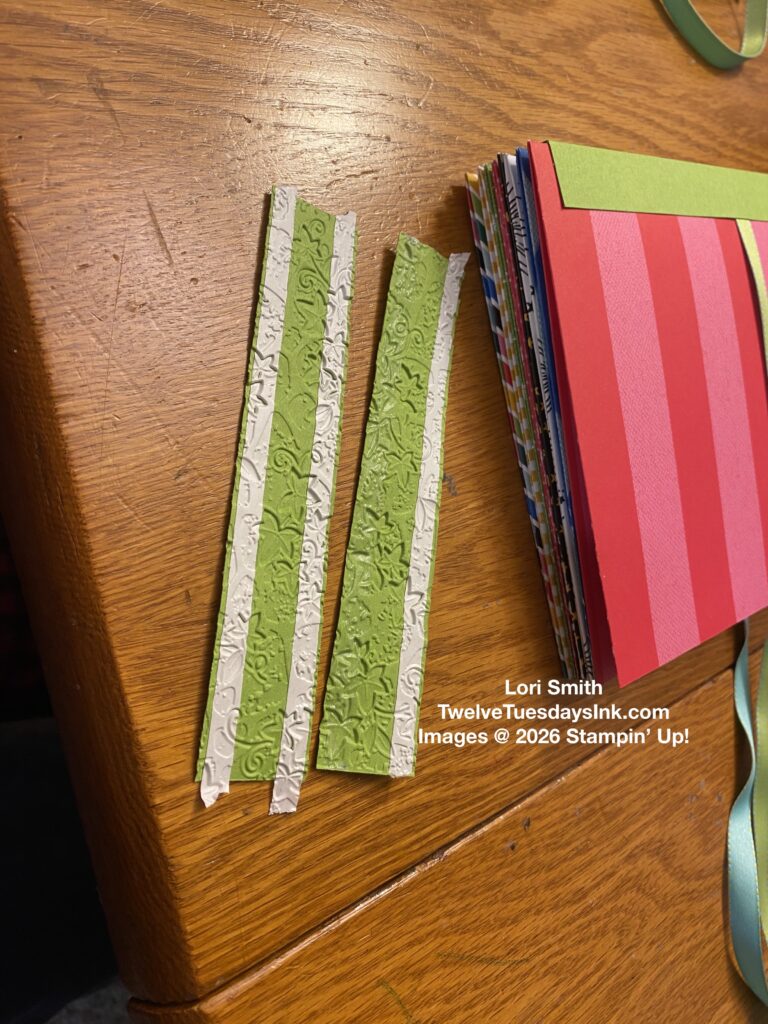
Secure the Ribbons
Just because the ribbon is secured in the spine, I also add card stock to the front and back to prevent the spine from tearing with use. Take into account the ribbon width when cutting the two 5″ strips. Make sure you allow for two strips of tape on either side of the ribbon. I chose to play a bit with my new embossing folder, Stone & Vine 3D. I recommend applying the tear & tape before your emboss the card stock. It still worked, but it took a bit to peel the protective paper off the tape.
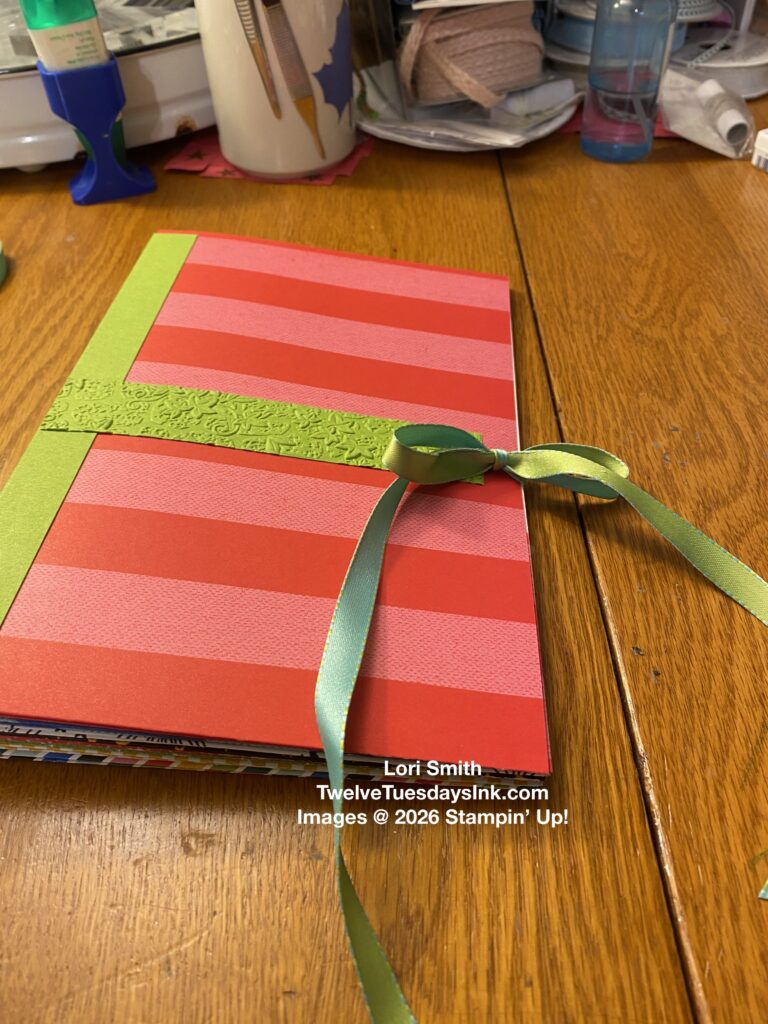
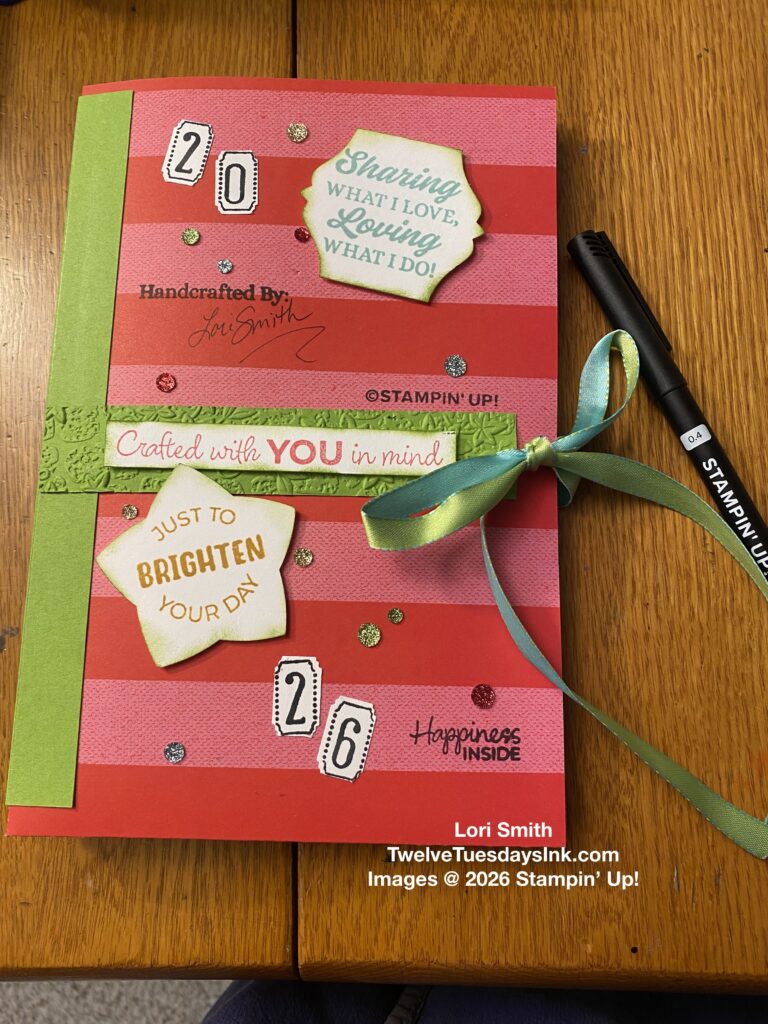
Add Keepsake Journal Finishing Touches
Decorate the keepsake journal with some finishing touches. I’ve had the Sharing Loving Crafting stamp set, for a while, but thought this would be a good time to try out the stamps I haven’t used yet. I also experimented with the sentiments and punches I haven’t used in a while. I dug out another retired stamp set and punch to help me create the year. Get out the Stampin’ Up! journaling pen to sign my name. I found that the sparkling sequins from the Fall catalog matched the DSP perfectly, so I added some.
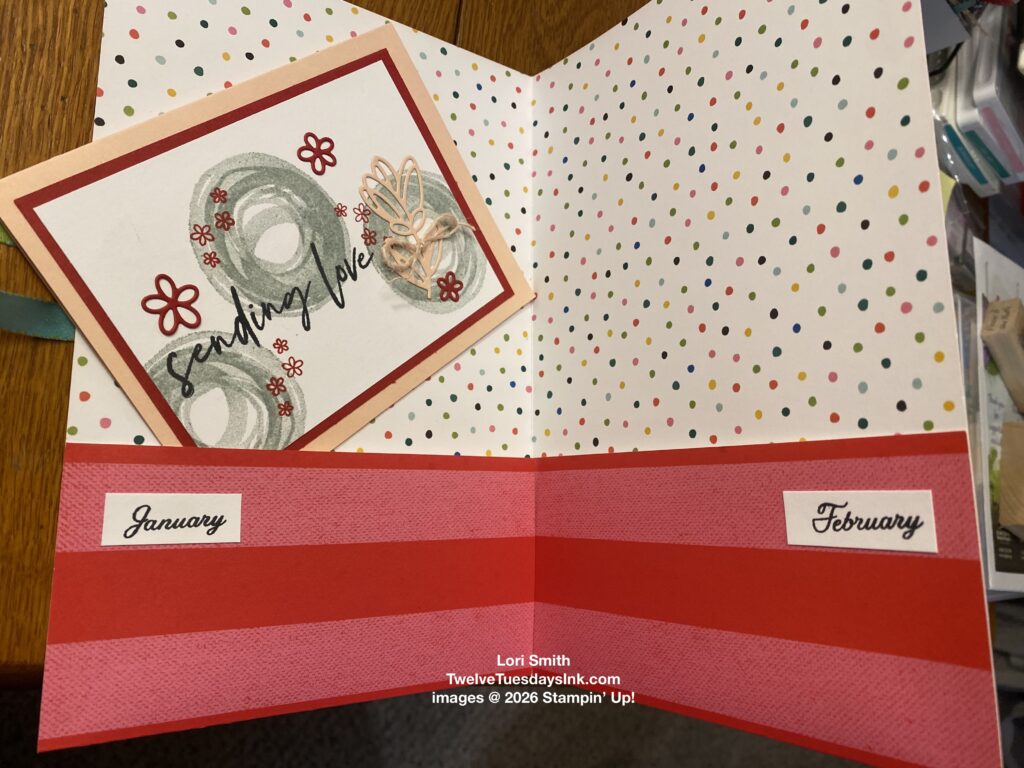
Finally, my keepsake journal for 2026 is ready to add examples I use for our Twelve Tuesdays Ink stamp group. Here’s our first card we all created with the Swirled Designs bundle.
I hope this inspires you to create your own keepsake journal. While I look forward to crafting one each year, I also enjoy looking back to the projects we’ve made in past years. Check out some other projects I’ve shared in the past and be inspired.