
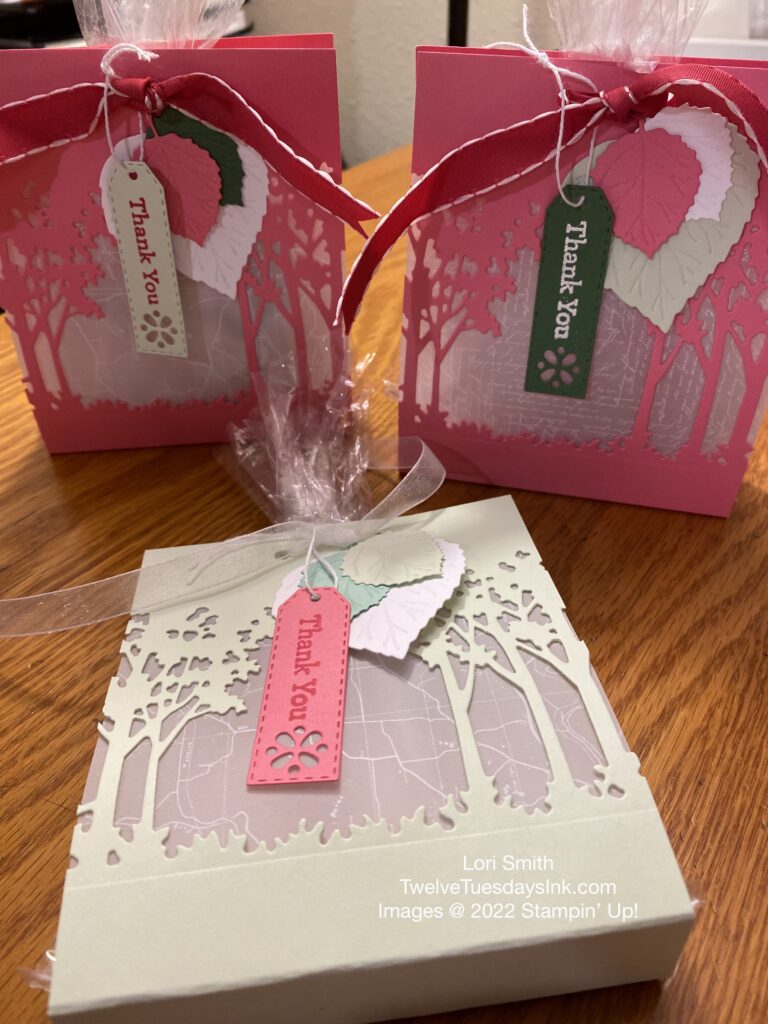
Recently, I’ve been using the Grassy Grove Bundle and it came to me, one night, to try making covers for some clear plastic gift bags that I need to use up. So I tried it, because I wanted to make some thank you gifts, and I liked it! Let me show you how they turned out. I think they are gifts to die for!
Gather Supplies & Equipment
Believe me, when I say, “It’s not hard.” But you do need the right tools to help you make this. First, gather your items.
- Cardstock, color of your choice – I used Polished Pink and Soft Seafoam, and then some coordinating colors of scraps.
- Vellum – I used Vellum 12″ x 12″ Layering Designs.
- Paper Trimmer
- Ribbons – Again, I used scraps. These happen to be retired, but they measured approximately 8″ – 10″.
- Cellophane bags – I wonder if the Peekaboo Treat Bags would also work for this idea?
- Stampin’ Cut & Emboss Machine, or comparable
- Craft dies – I used Grove, Designer Tags, and Aspen Tree dies.
- Hole punch
- Don’t forget to have your favorite adhesives handy. I used Mini Glue Dots.
- A Take Your Pick tool is good have!
Die Cut the Gift Cover Front
Let’s get started.
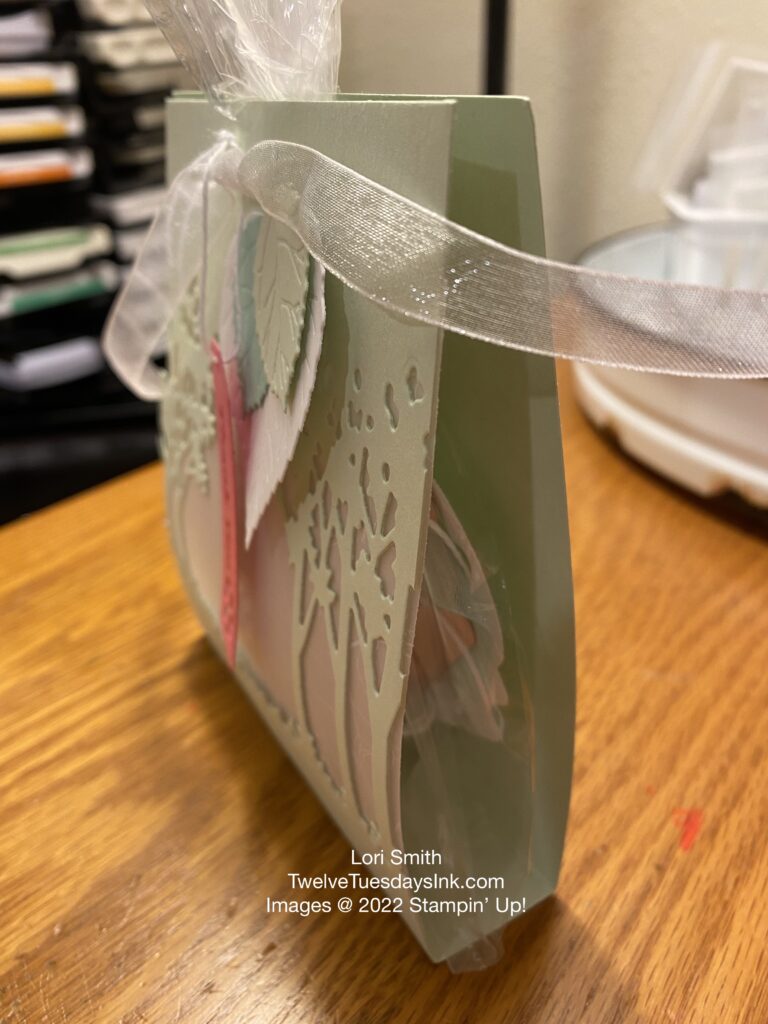
- Cut a piece of cardstock to measure 4-1/4″ x 11″. Then, score on the long side, at 5″ and 6″. Gently fold on the score lines. This will help you to determine how to place the die on front of your gift cover base. When folded correctly, imagine that you make something like a bag without sides and the top is open. Or, when you look at it from the open side, the paper is “U” shaped.
- Chose your Grove die and position it on the “front side” of your base. Take care to orientate the die so the tree tops will be near the top edge of the base.
- Make the correct die cutting sandwich for your die cutting machine and cut the trees. See photo above.
Vellum, or Not
Adding vellum is totally optional. I honestly think you could omit this, if you choose. But, I wanted to use what I have and think it looks very nice! And the vellum keeps what’s behind a bit of a secret. I think you could also try to use a Peekaboo Treat Bag in the place of a plastic bag to hold your gift.
- Measure and cut the vellum to cover the entire area of the die cut. My vellum piece measured 4″ x 4-1/4″.
- Position the vellum so the right side is facing toward you, covering the holes of the cutout, and behind the cardstock.
- Adhere glue dots in the four corners of the vellum to keep in place.
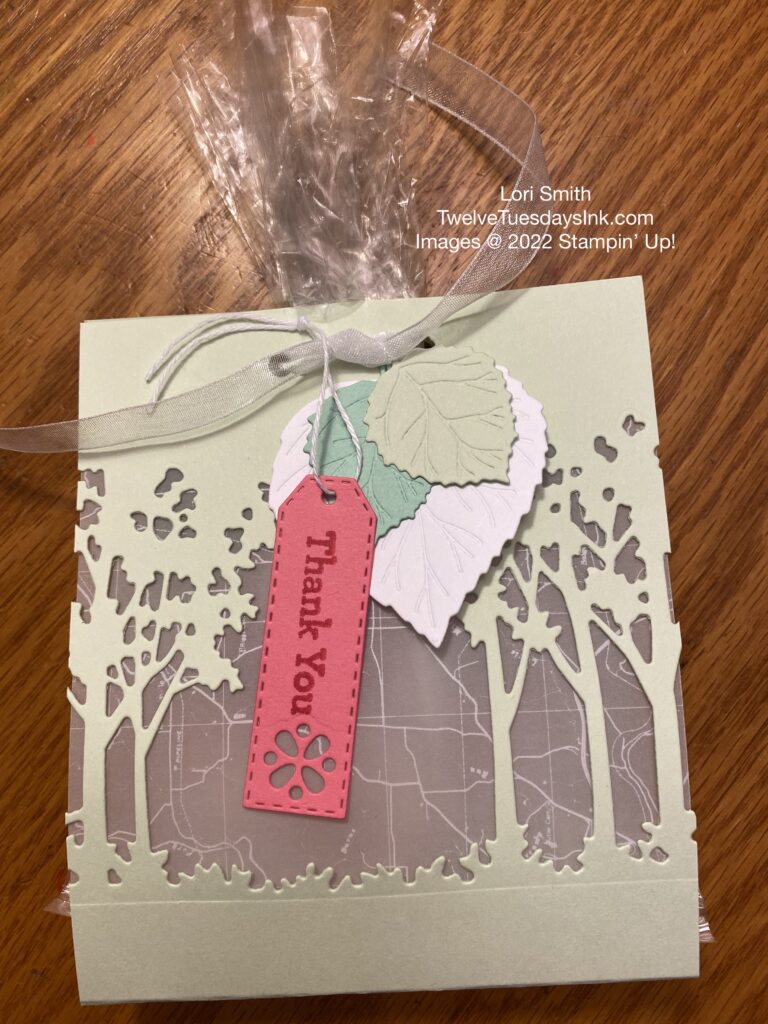
Gifts to Die For Embellishments
Now, embellish the gift cover! As I eluded earlier, I used three die sets to help me create these gift bag covers. (See the supply list).
- Die cut some leaves, using the Aspen dies, from coordinating colors of paper scraps you may have.
- Also, die cut a tag with one of the dies from the Designer Tags die set.
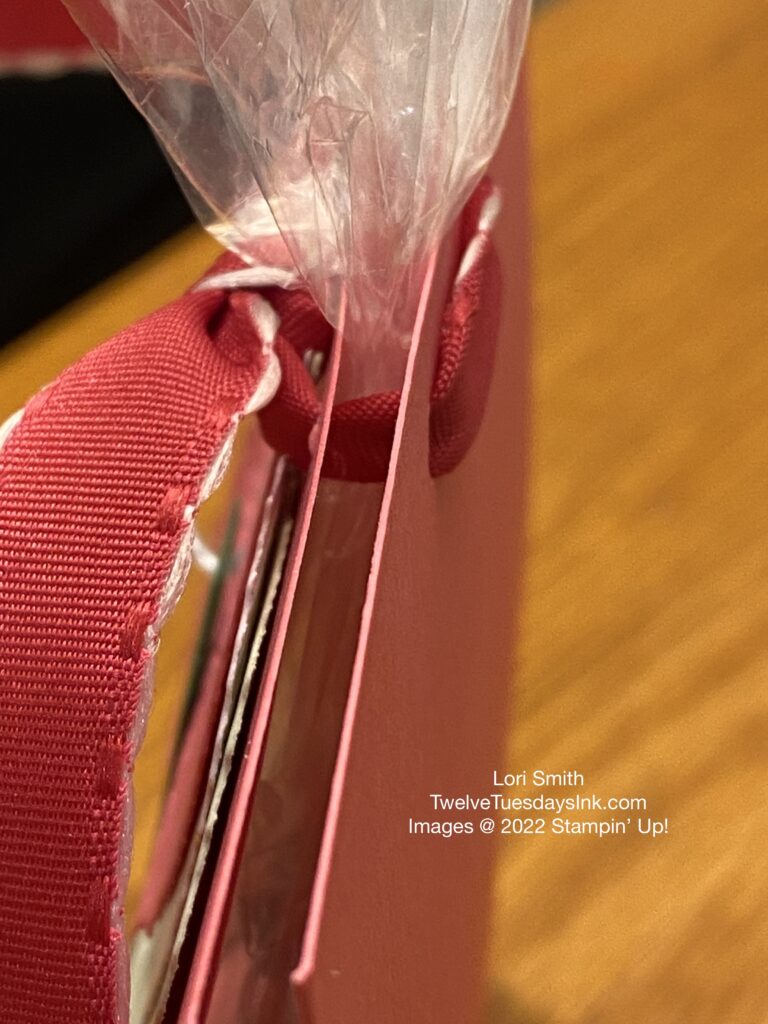
- Punch a couple of holes at the top (front and back) and thread a length of ribbon through to tie the cover closed, once you have the gift bag in place. See photo above.
- Adhere all the die cuts with mini glue dots, as desired, to the front. See previous photos to guide.
- Stamp the tag, if you wish, and tie it to the ribbon with a little string. Another option would be to adhere it with a glue dot.
What’s Inside the Gifts to Die For?
I bet you’re curious about what I put inside my plastic gift bags. Because I wanted these thank you’s to be a little special, I “CASE’d” (copy and share everything) and made the Designer Tags ideas from the annual catalog and tucked them inside the bags. The intent is for my customers to use them to embellish something else, as they choose. I hope they like them.
Another Gift to Die For Idea
Don’t limit yourself. Check your stash for other die sets that could be used with this idea. Here’s an example.
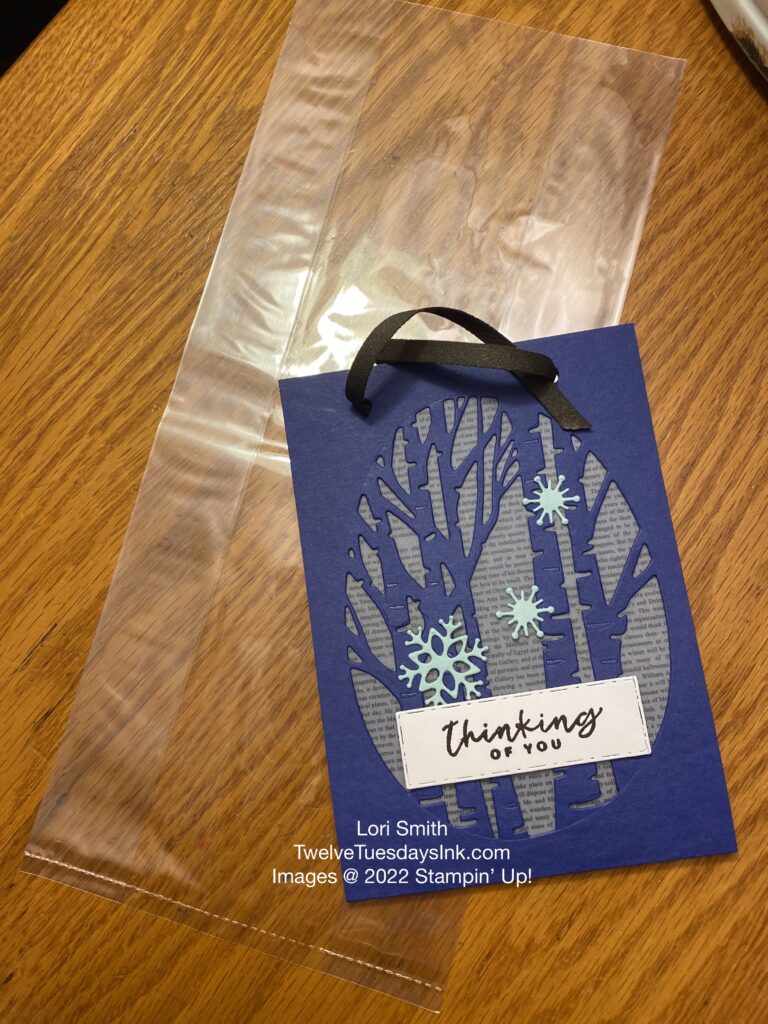
Of course, while I was creating my gifts to die for with the Grove die set, another idea came to me with using the Aspen Tree dies. But, when I held this die up to the cardstock base I had already cut, this die was too big. As a result, I needed to rethink the size of my cardstock base. To use the aspen trees die, I cut a piece of cardstock that measured 4-1/4″ x 12″, then scored once, on the long side, at 6″. When folded, it looked like a big card base. But the six inches is the right length to fit this die. I used colors here that don’t scream “girly” and I have another gift bag with a cover to fill as I need it! Maybe I will need it a Christmas time, who knows?
So, make a gift to die for! Check out some other gift ideas. Click HERE.
Happy Crafting, Everyone!
Great idea!!
I’m glad you like them!