
Something our annual catalog offers is a chance to pick a punch or dies that coordinates with the stamp set bundle. And the Labeled With Love bundle does this. You can select either a coordinating punch or coordinating dies as part of your bundle savings. You even have an option to purchase the punch and dies separately. It’s simply Labeled With Love, your way.
Labeled With Love Birthday
When we meet for our monthly stamp club evening, I like to keep the projects fast and easy to assemble. So I cut all pieces before time. But this card features several different products I feel work well together to create this simple design birthday card. The card base is Boho Blue cardstock, with white cardstock framing the Thoughtful Journey DSP. I die cut the flourish with the Thoughtful Wishes dies, then dug out Night of Navy and Misty Moonlight inks to stamp the label. The label is punched using the Labeled With Love punch bundle.
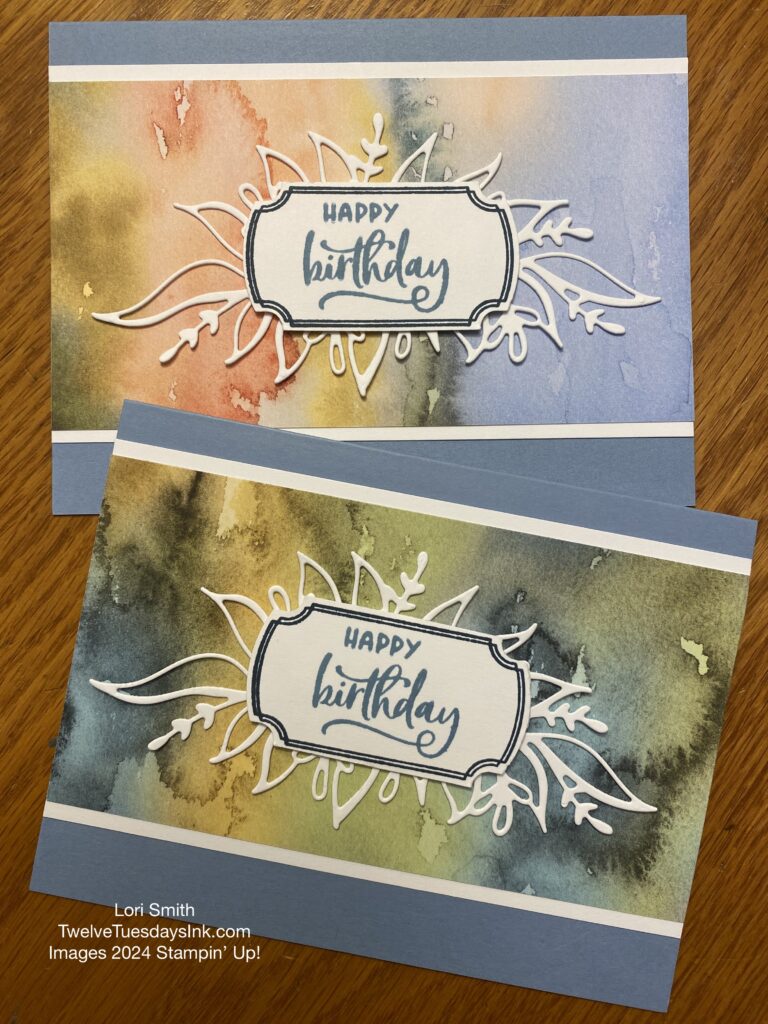
I cut the DSP to measure 3″ x 5-1/2″, adhered it to a white paper measuring 3-1/4″ x 5-1/2″, then positioned where I wanted on the Boho Blue card base. Make the landscape style card base to be a standard 4A card size. After die cutting the flourish, I glued it to the center of the DSP with Liquid Glue. I mounted the label to the middle of the flourish with dimensionals. Stamp “Enjoy your day” on the inside of your card. In addition, if you choose, pick your favorite bling or string to add a little extra.
Making Life Better
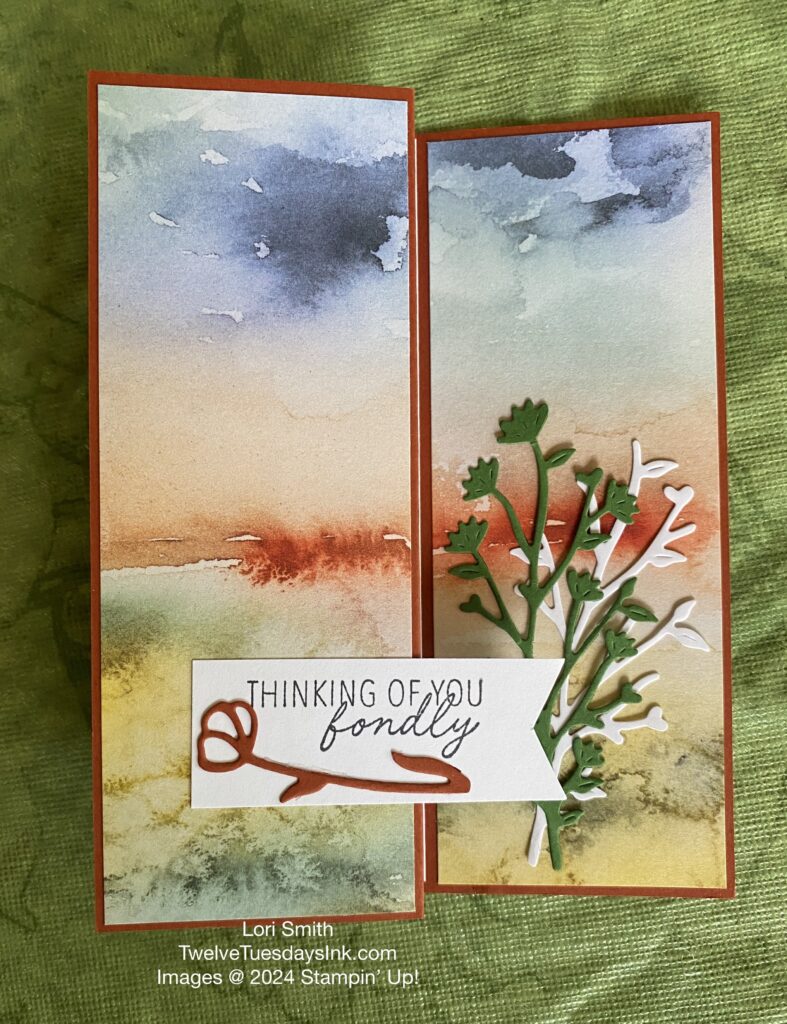
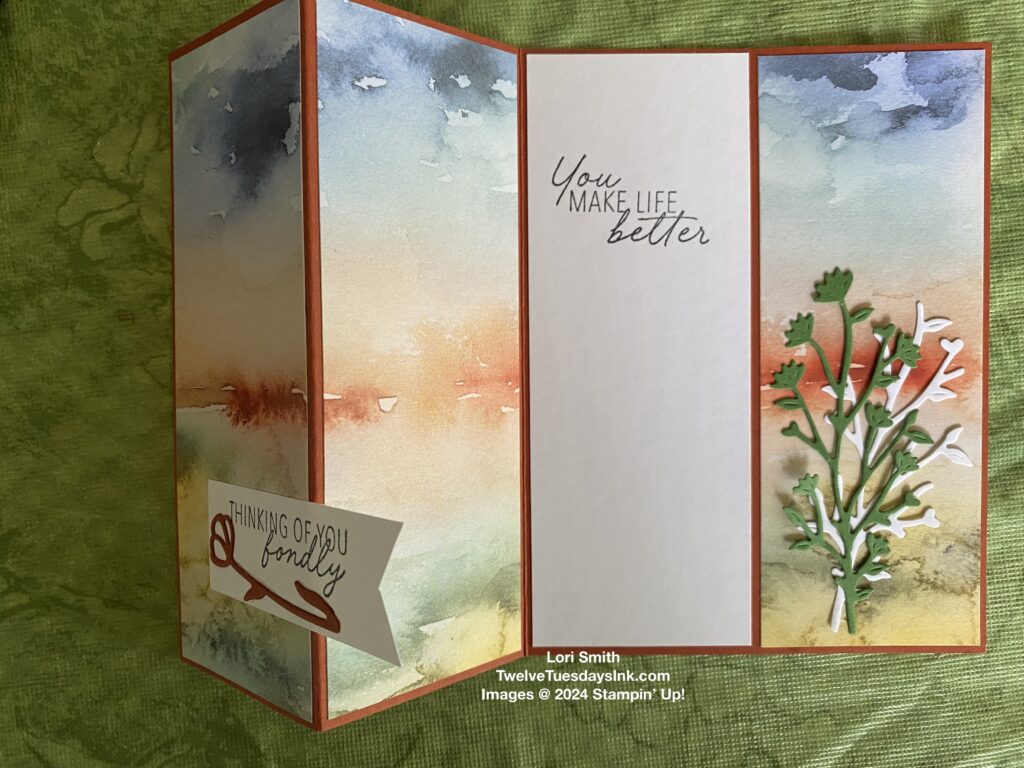
Julie and I had the same idea, because she created a card for us to make that same night using the same dies and DSP! I love that when it happens!! This is a Z-fold card using most of the 6″ x 6″ sheet. She used the Thoughtful Wishes bundle and the Thoughtful Journey DSP for her card.
I created another card at home because I like it so well. While I used the Thoughtful Journey DSP, I chose a now retired stamp set, Quiet Reflections, for the sentiments.
To make this card: Cut a 6″ x 6″ sheet of DSP by first trimming to a 5-1/2″ height. Then create three 2″ x 5-1/2″ strips of DSP and one 2″ x 5-1/2″ strip of white cardstock for your sentiment. In case you’ve not made a Z-fold, it’s easy. Once you make the card base (5-1/2″ x 8-1/2″, scored at 4-1/4″) and fold in half, simply fold the card front again, to meet the center fold, as shown in the examples below.

More Labeled With Love Ideas
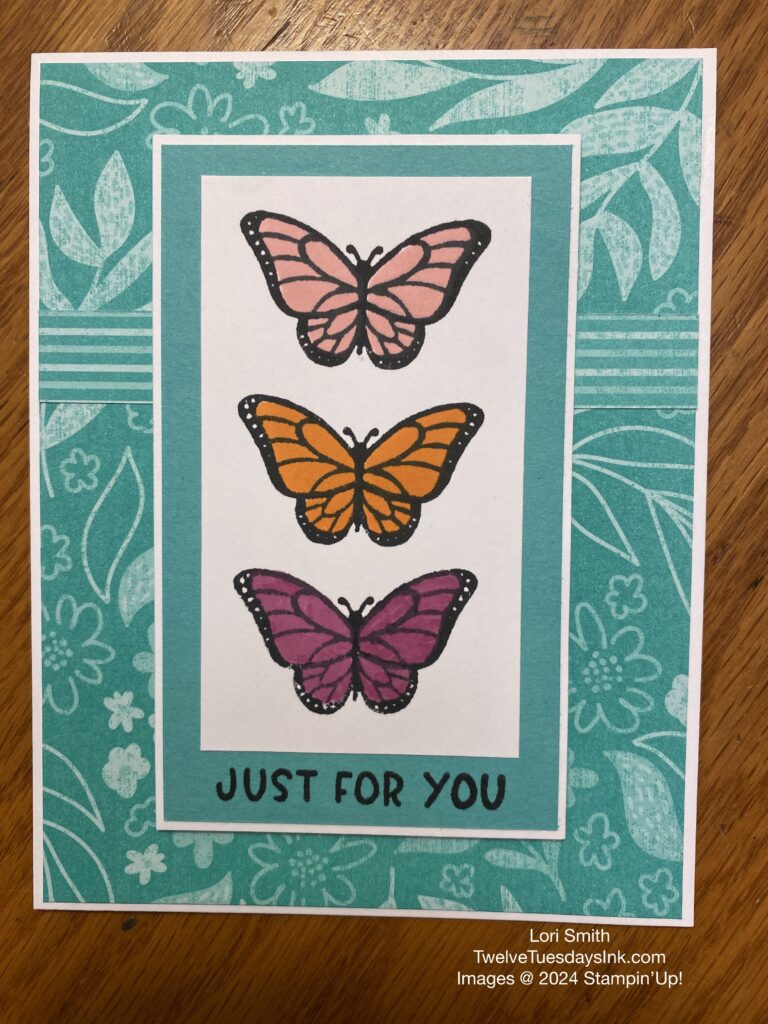
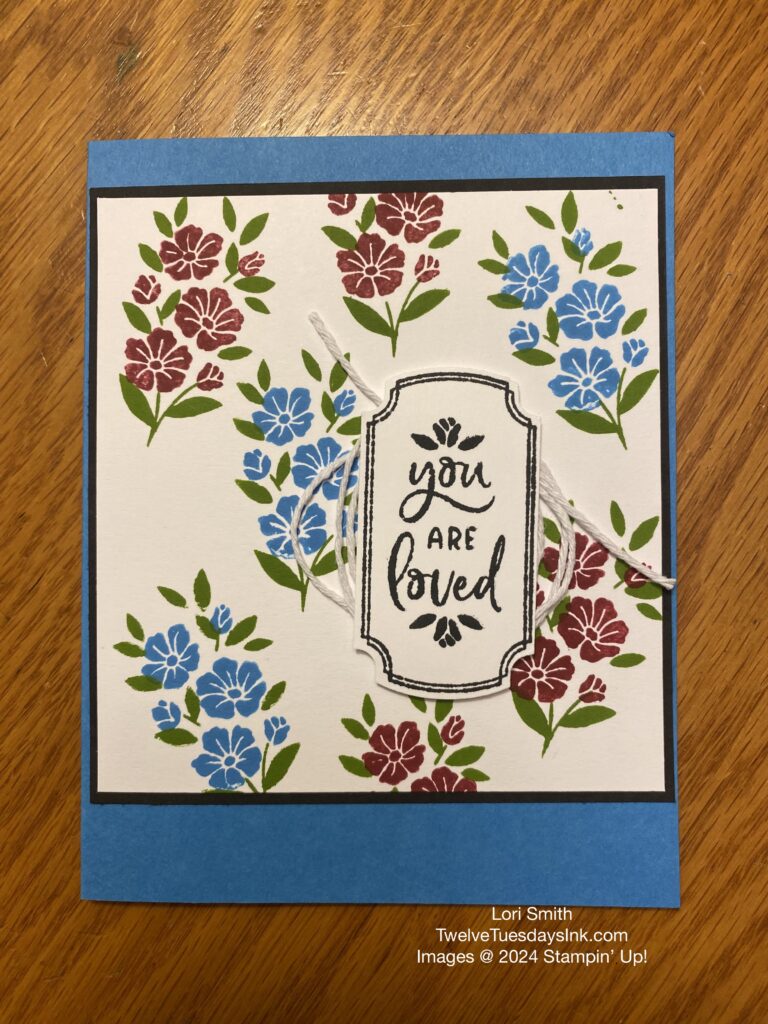
While I was playing with this bundle, I challenge myself to use all the stamps in the case. The Azure Blue card in the middle was CASE’d from the card on page 84 of the annual catalog.
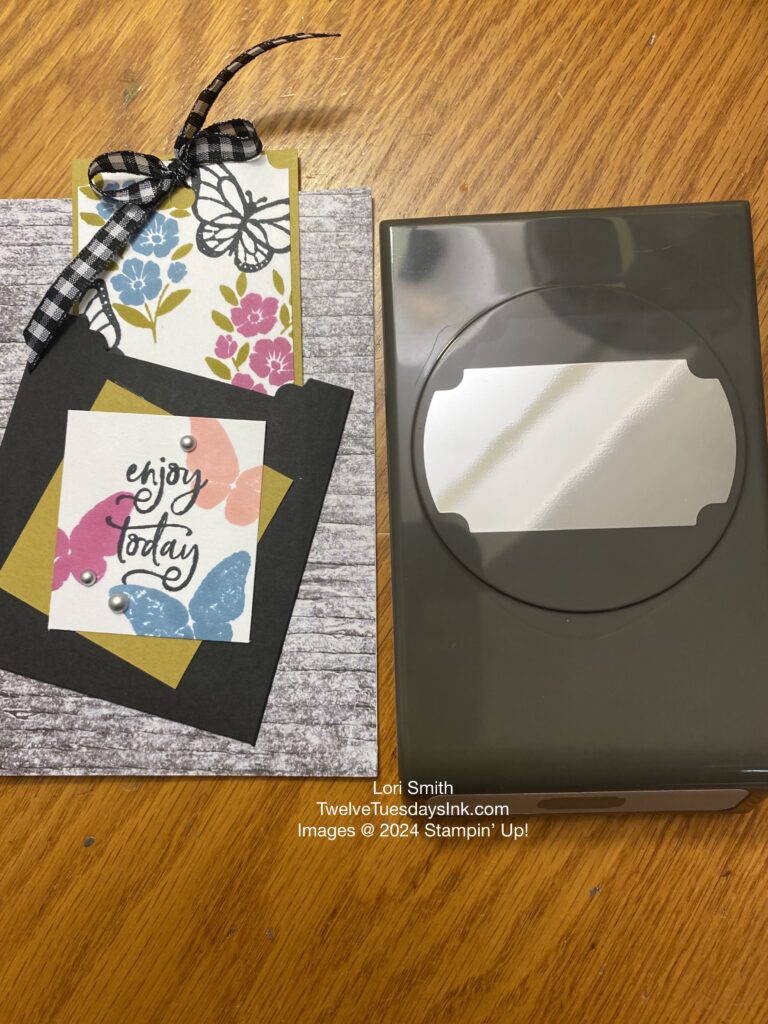
My last example I made for the group, using this bundle, is a “gift card” card. I used the punch in a unique way to add interest to the front pocket of the next card. This card is ready for the bookmark and gift card, when it’s time to give. The card base is made from white cardstock but covered with a piece of Country Woods DSP. I’ve also used a combination of my favorite In Colors available right now: Petunia Pop, Petal Pink, Boho Blue, Wild Wheat, and Pebbled Path.
In case you prefer dies over punches, these projects can easily be create using the Labeled With Love dies bundle. It’s simply Labeled With Love , your way!