
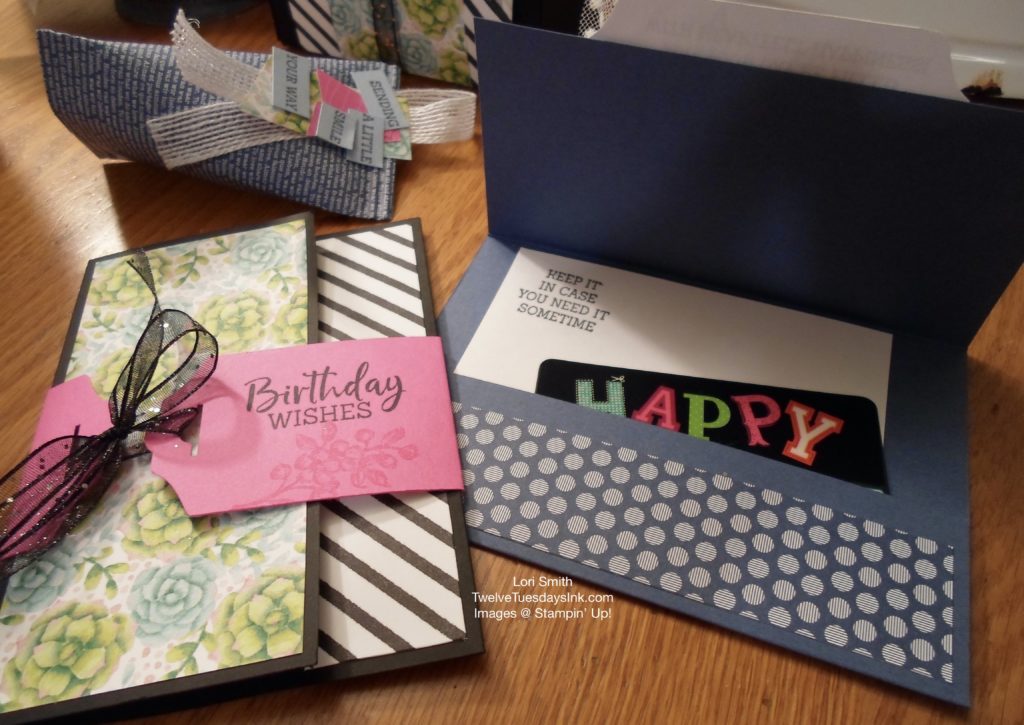
Here’s an idea to make a greeting card that hold gift card perfectly. This card style will also hold money or lottery ticket gifts, too. I don’t remember where I exactly found the idea, Pinterest probably. But it’s one of my favorites and easy to make, too!
This Card is Easy to Make!
- Gather your supplies. See what I used at the end of this article.
- Begin with a piece of cardstock that measures 5 1/2″ x 8 1/2,” and score along the long side at 2″ and 6.”
- Fold inward on both score lines, to make a 2 1/2″ flap and a 2″ flap. See how it is coming together already!
- Run some adhesive (I use Multipurpose Liquid Glue) on each side of the 2″ flap to make a pocket. The other flap will fold over the pocket to conceal the inside contents.
- Cut two pieces of DSP to decorate the flaps, one that measures 2 1/4″ x 5 1/4″, and another measuring 1 3/4″ x 5 1/4.” Adhere DSP to the flaps.
- Make a card insert with some (white) cardstock, that tucks into the pocket, to stamp your inside message on. The size of the insert can be any size you chose, as long as it fits in the pocket and the top flap can close.
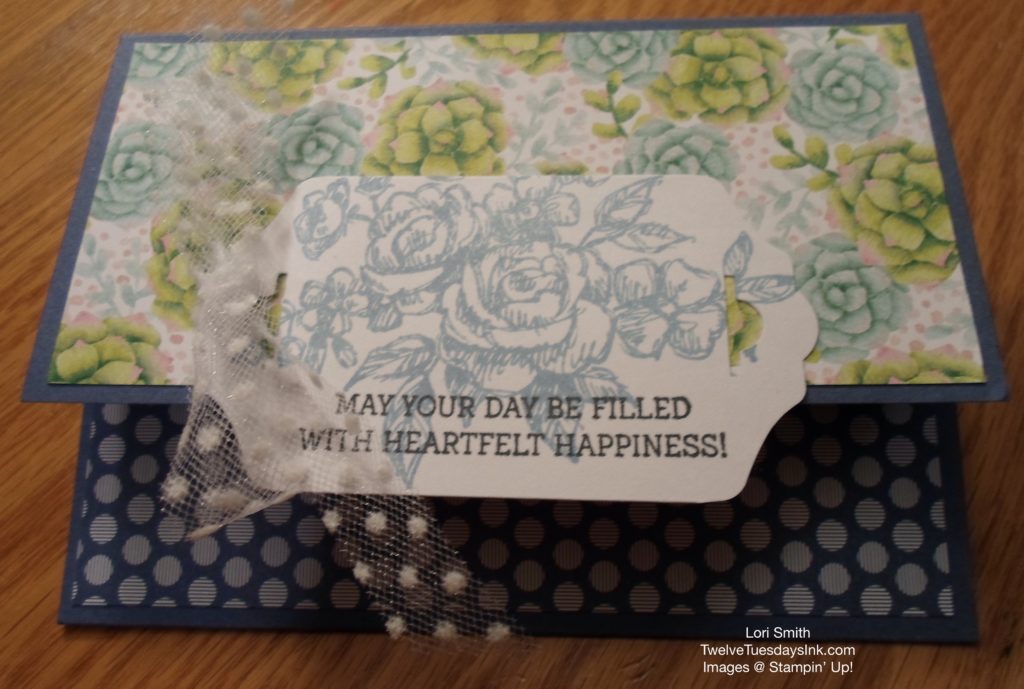
- Embellish the top flap with a belly band, punch art, or diecuts, and don’t forget to stamp a greeting!
- Add ribbon or linen thread, or other embellishments, such as pearls, sequins, gems, if desired.
- You now have a greeting card that holds a gift card perfectly! And it’s easy to mail, if needed.
Below, the Misty Moonlight (blue) card is a “landscape” version. You can see how perfectly the greeting and gift card tuck inside, above. The black card in the photo above, with a pink belly band, is a “portrait” version of the same card. Make both cards the same way, using the directions above!
A Plug for Stampin’ Up! Product Coordination
I must pause here to put a little plug in for Stampin’ Up! This has to do with the quality of product coordination, and the Stampin’ Up! company is very particular in this matter. They pride themselves on having quality products and the fact that many of these items coordinate nicely together. And because this is the case, I have a perfect example here. I used a piece of retired DSP to make these cards, but one would not know these papers were not meant to be together. This retired piece of DSP has some retired In Colors in it, but I absolutely love how the colors work with three of the current In Colors, Seaside Spray, Magenta Madness and Misty Moonlight!
More Gift Card Inspirations
This small greeting card is simply constructed. The size of this card would easily fit a gift card tucked inside. Although, you may need to add a pocket for it, or tape it in. And you’d definitely need to put it in an envelope, if you didn’t tape it. Another way to use this little card is to just punch a hole in the corner and tie it to your gift bag or box, then it becomes the tag or embellishment of your gift!
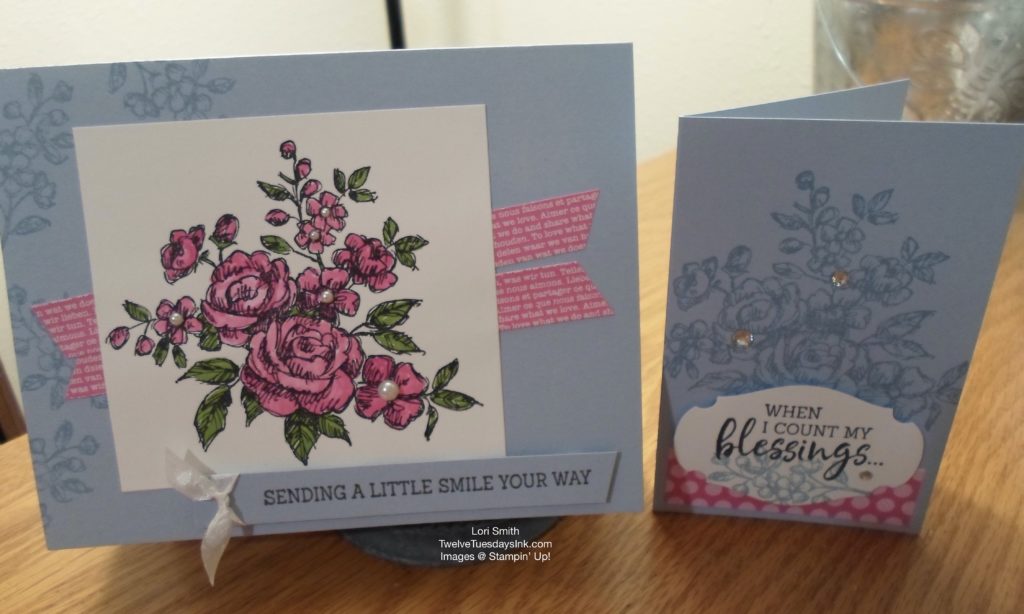
Here’s how I made it: I cut the piece of cardstock to measure 4 1/4″ x 5 1/2″ and scored it on the long side at 2 3/4,” then folded it in half. (Yes, this is just a quarter piece of 8 1/2″ x 11″ cardstock and folded in half). Again, I used the Fancy Phrases stamp set, “When I count my blessings . . .” sentiment.
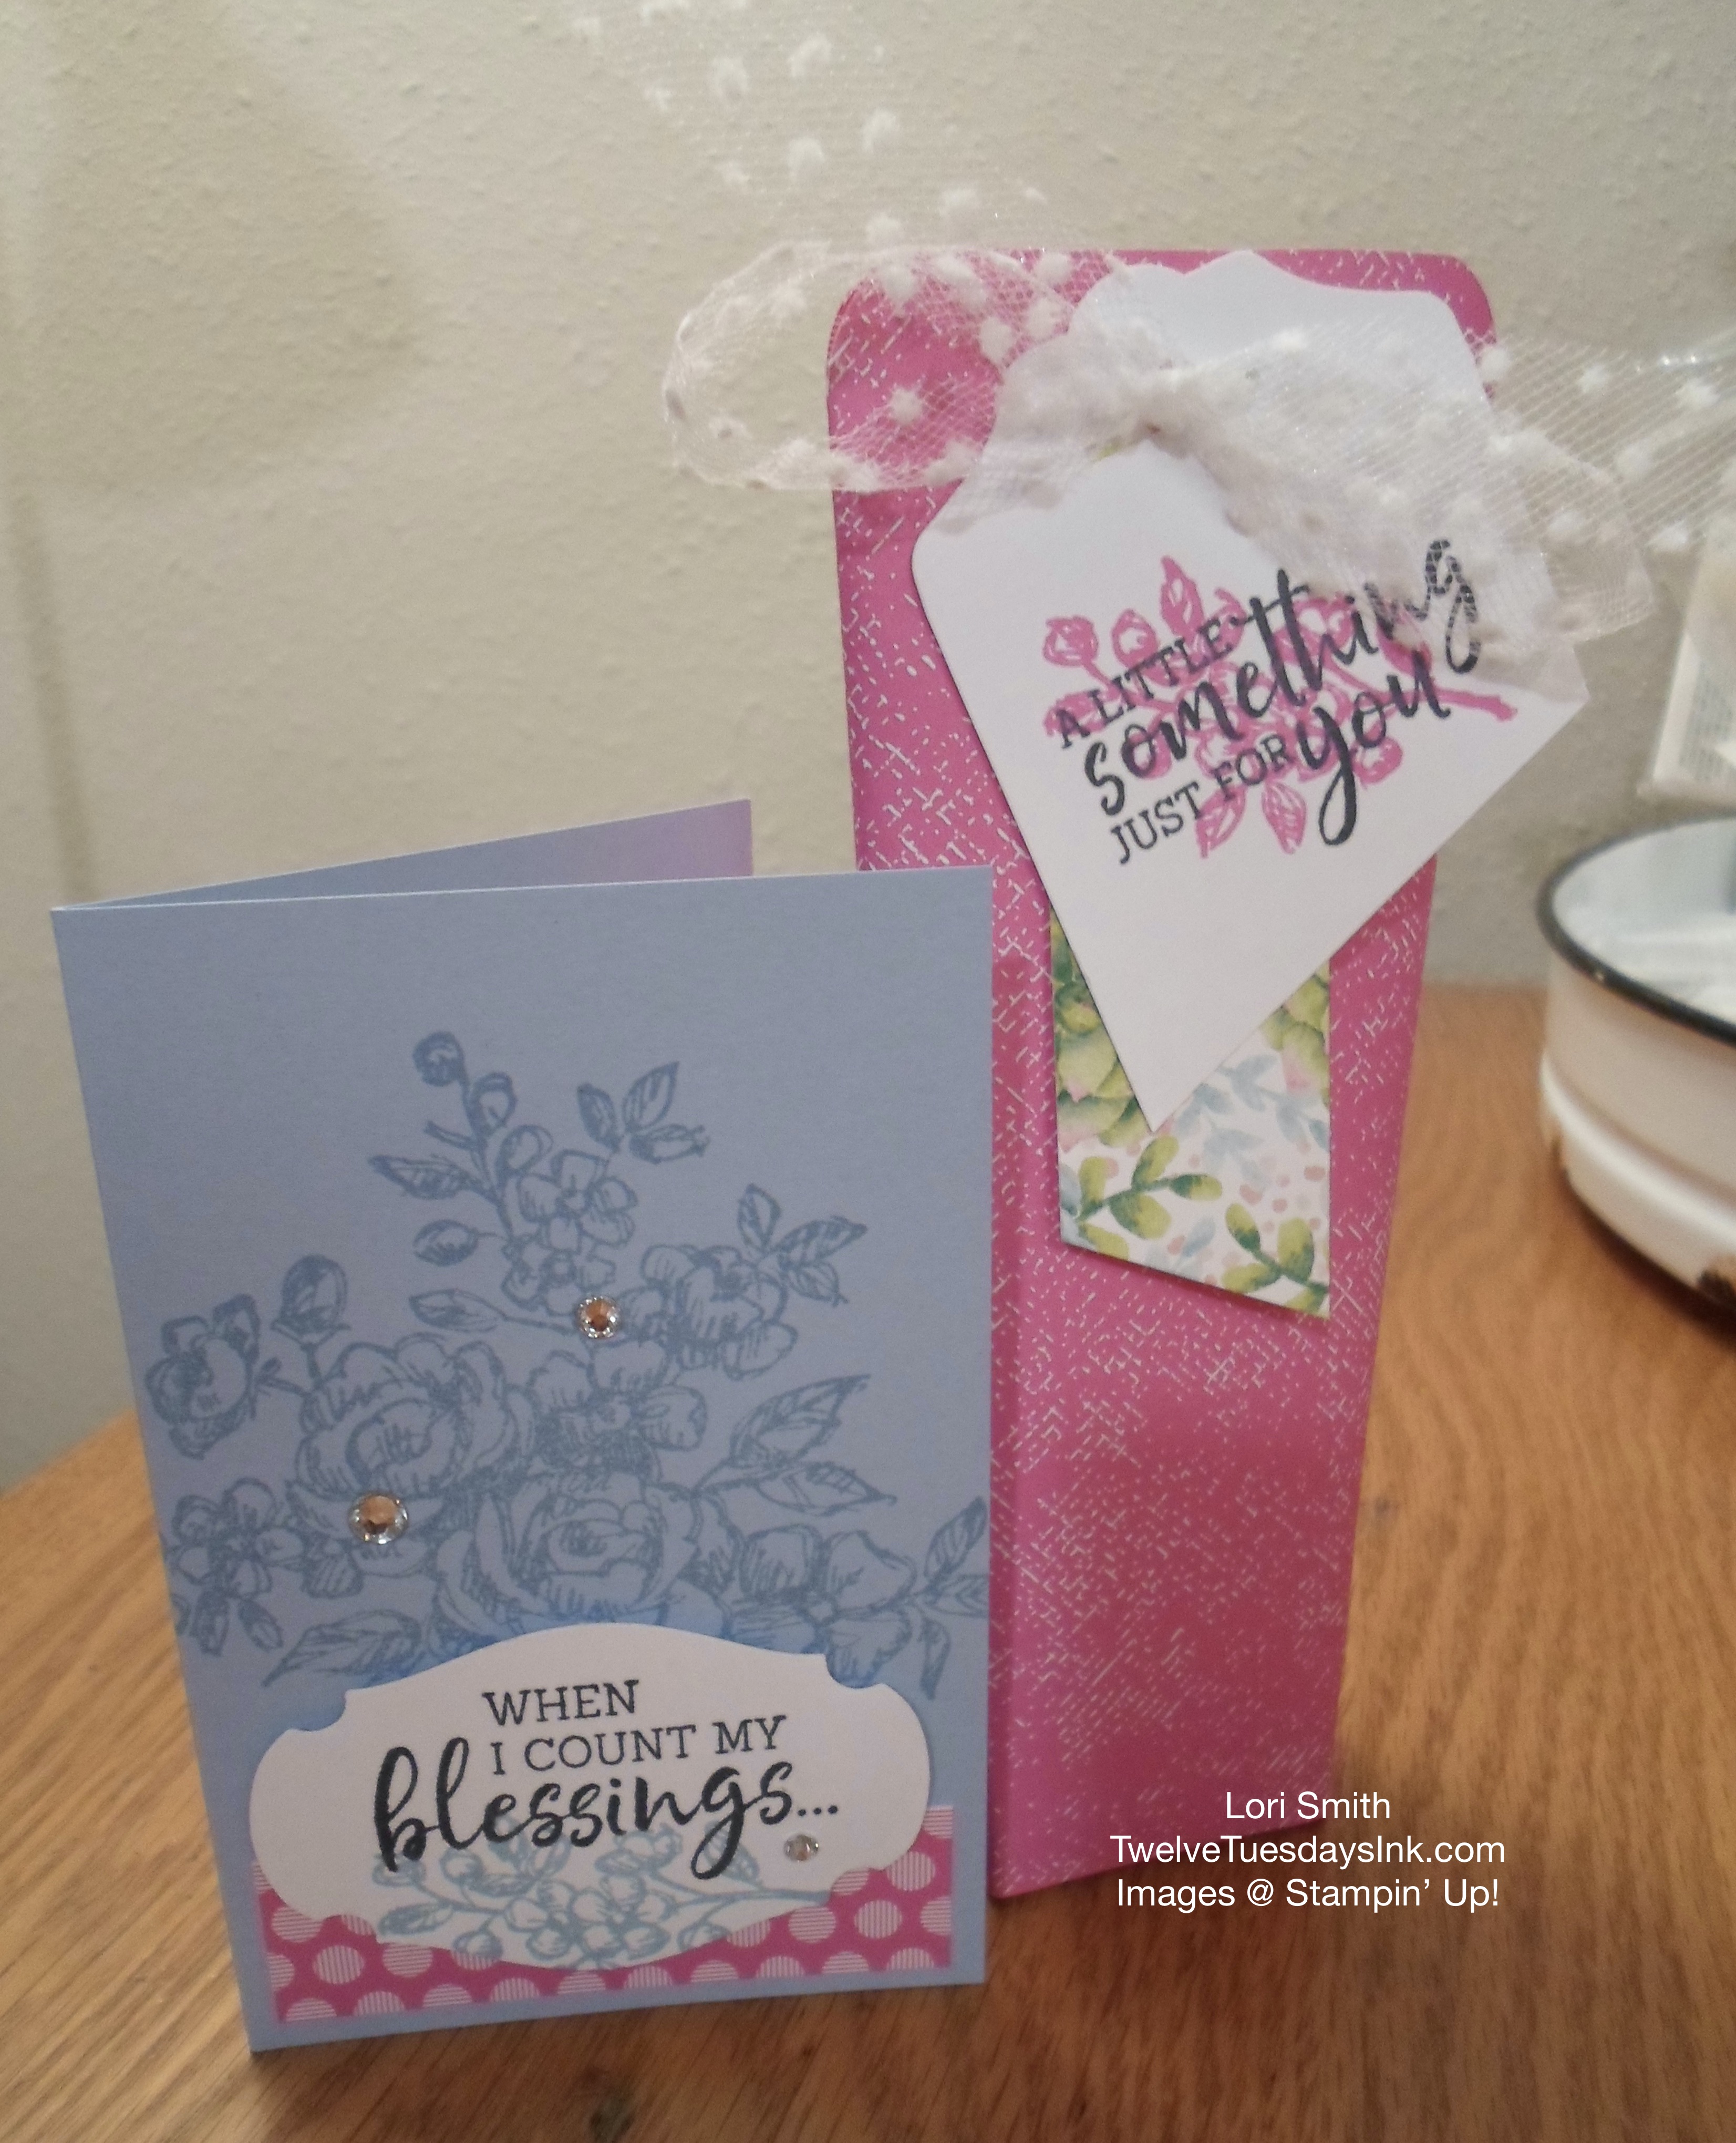
The “Sending a little smile your way” card is made with a card base that measures 5 1/2″ x 8 1/2″ and is folded in half. One can certainly tuck a gift card inside, also.
To see some 3D gift holders that features the Fancy Phrases Bundle, click here. A couple of the ideas found there could also hold a gift card. I just think that making a gift card holder is much more personal than the plain envelope you get when you purchase the gift card, and means a little more to the one receiving it. I really like to use the pocket card idea, especially when it gets close to graduation time!
Featured Supplies
Here is a list of some of the products I used to make these cards. Select an item # to learn more about each one!
- Fancy Phrases Bundle, item # 154090
- 2020 -2022 In Color Designer Series Paper, item # 153070
- Seaside Spray cardstock, item # 150883
- 2020 – 2022 In Color cardstock, item # 153074
- Basic Black cardstock, item # 121045
- Story Label punch, item # 150076
- Pearl Basic Jewels, item # 144219
- Rhinestone Basic Jewels, item # 144220
- 1/4″ Crinkled Seam Binding Ribbon, item # 151326
- 5/8″ Polka Dot Tulle Ribbon, item # 146912
- 3/8″ Glittered Organdy Ribbon, item # 147897
- Seaside Spray ink, item # 150085
- Memento ink, item # 132708
I hope this inspires you to make a greeting card gift card holder!