
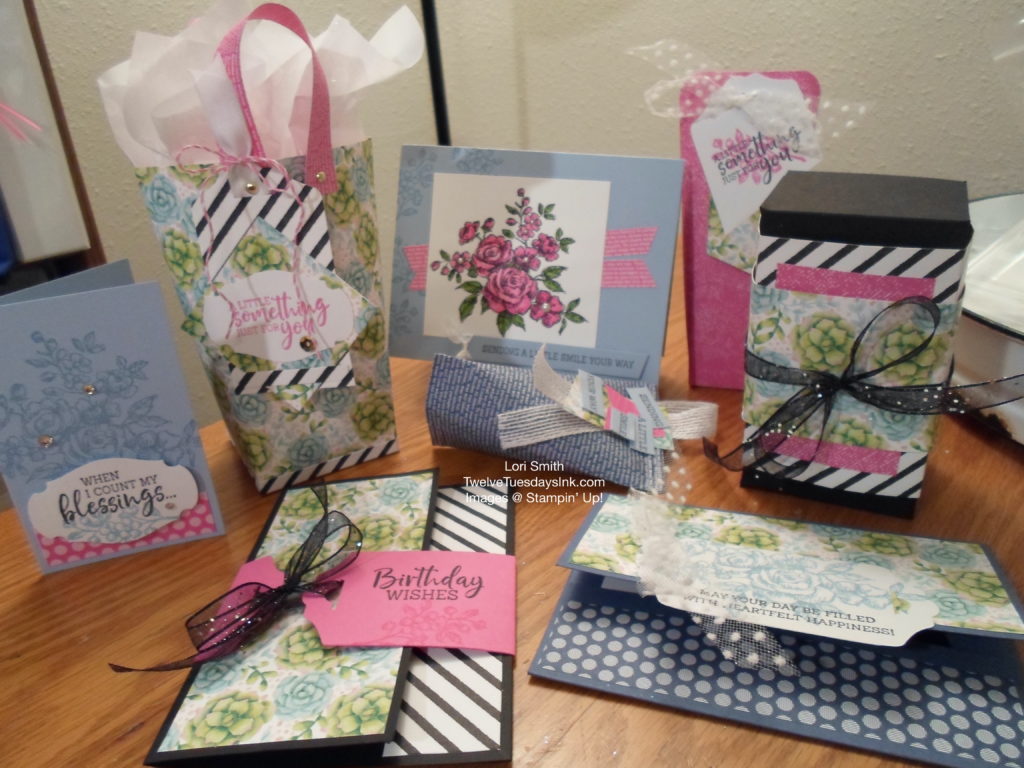
Have fun, this season, or any time, making four gift & treat holders that will give your gifts an extra special touch. Three ideas I found while browsing Splitcoast Stampers and searching in the tutorial section for the step-by-step directions. The last gift box is my own design. These projects only require some Designer Series Paper (DSP), cardstock, strong adhesive, and your creativity to embellish.
6″ x 6″ Treat Holder
Gather one 6″ x 6″ piece of DSP, one piece of 2 1/2″ x 3″ cardstock that is scored at 3/4″ on all four sides, scissors, and strong adhesive. I prefer to use a combination of Multipurpose Liquid Glue and Tear & Tape for this project.
Basic Assembly:
The following two photos show how to construct the base for the holder. Use Multipurpose Liquid Glue to adhere the tabs and form a rectangular box.
Next, place 2 strips of Tear & Tape adhesive on two sides of the 6″ x 6″ DSP, perpendicular to each other. Then starting at one taped edge, align a side of the base to the DSP, and begin “rolling” it along the entire edge of DSP. Once all four sides of the base are covered by the DSP, tape the seam closed and complete the sack. When finished, the result looks like a tube of DSP with a rectangle box at one end. (My paper color is different, in this photo, because I decided to take this picture after I finished the first treat holder. But you get the idea how to start attaching the paper to the base, here).
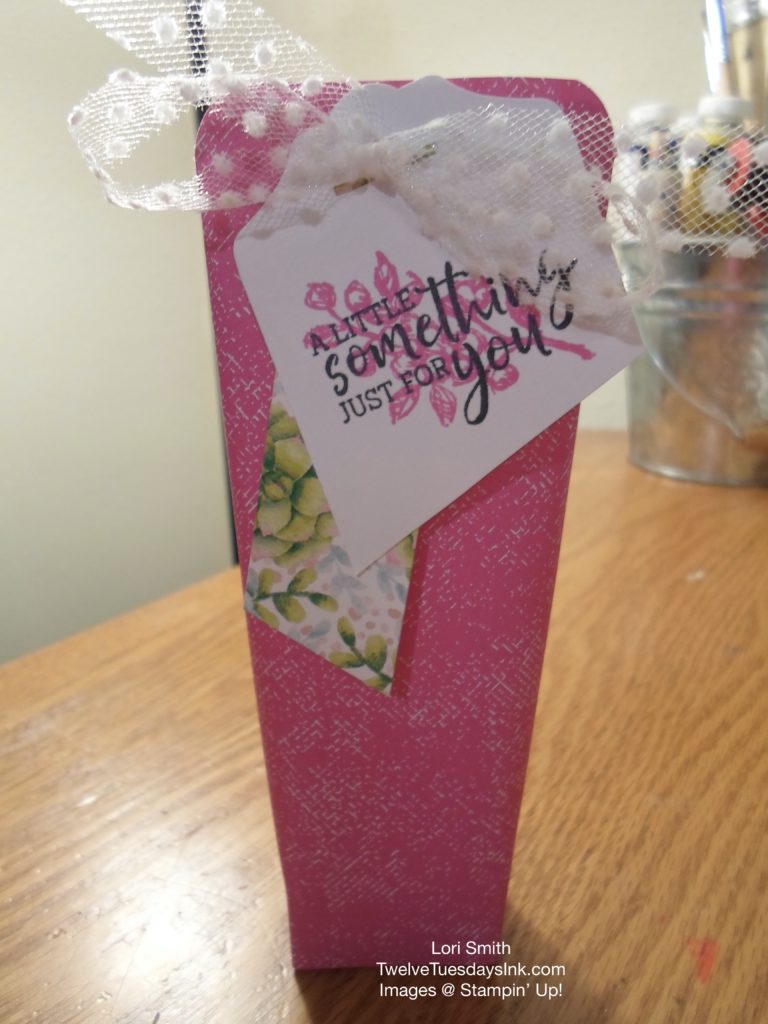
I chose the Fancy Phrases Bundles to embellish this gift holder, because the words with this stamp set and the tag punch are PERFECT for gift giving! Below is a finished container that can easily hold some candy, a purse sized lotion, chapstick, or jewelry inside!
Box in a Bag (for larger gift)
Assemble this tote the same way as the 6″ x 6″ treat holder. But use a piece of 5 1/2″ x 11″ DSP for the sides and a piece of 4 1/2″ x 4 1/2″ cardstock for the base, that is scored at 1″ on all four sides. I added two strips of DSP for handles and made a tag to decorate it. This gift tote has a square base and is a much larger container. So you can give a larger present. Oh what fun!

Make a variation of this by cutting the size of the DSP a bit differently, 9″ x 11″ or 10″ x 11.” As a result, it will make a taller bag that can fit a larger sized lotion bottle inside. (Just remember to wrap the 11″ side of the paper around the base).
Sour Cream Container
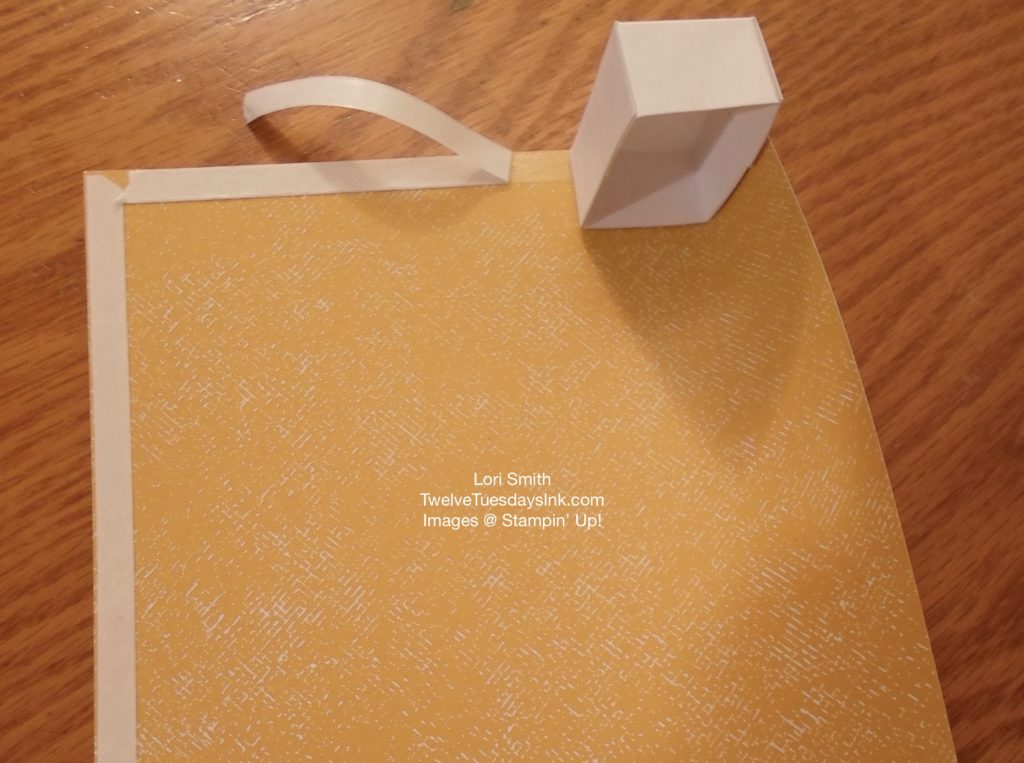
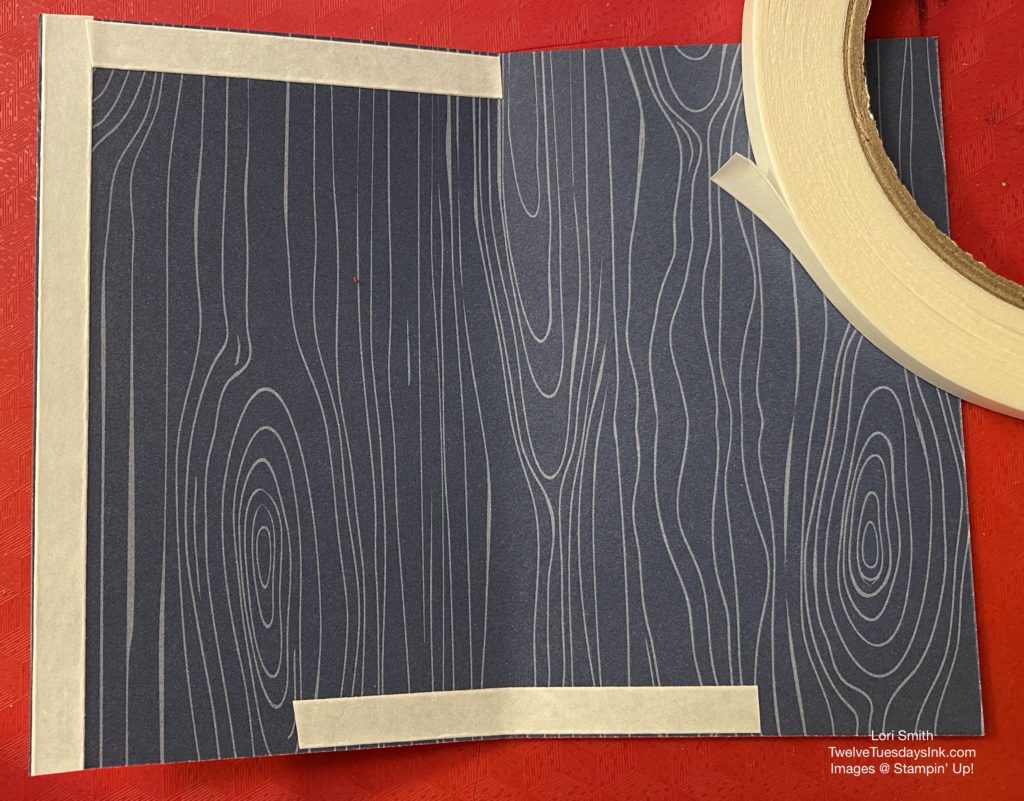
We’ve seen these shapes in the restaurants for the actual condiment and thus the name. Search for a video and directions, “sour cream container tutorial” to explain how to make this gift wrapper. You’ll need one piece of lightweight paper, DSP or cardstock, that measures 4 1/4″ x 5 1/2,” and strong adhesive. Once the paper is cut, add the Tear & Tape. See the photo for how I placed the tape on my piece of 2020 – 2022 In Color DSP.
Next, roll the DSP into a tube shape, and adhere the short sides together. Then, tape one end of the tube closed by pinching it flat. Before closing the other end, add your little gift item(s), then pinch the end together, so it is perpendicular to the opposite end.
I dug out my paper crimper and crimped the two ends of the wrapper. By doing this, I think it makes the container look more authentic! I left the one end open in the example here, because I will add a small gift later. To add the embellishment, I simply stapled it to one of the closed ends.
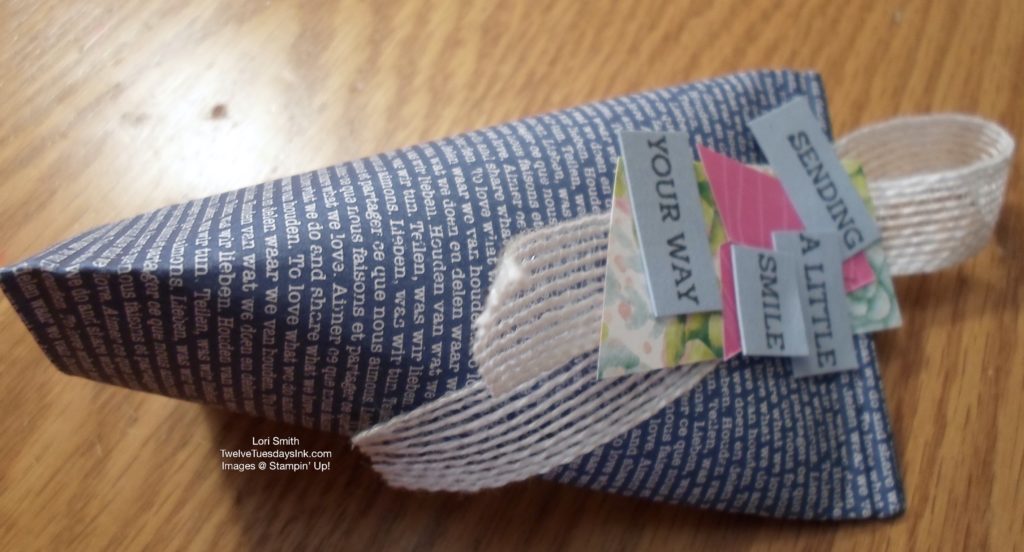
The result reminds me of a fortune cookie shape, but an excellent way to give a birthday favor, or a little treat to coworkers and make it special!
My Last Gift Box Idea
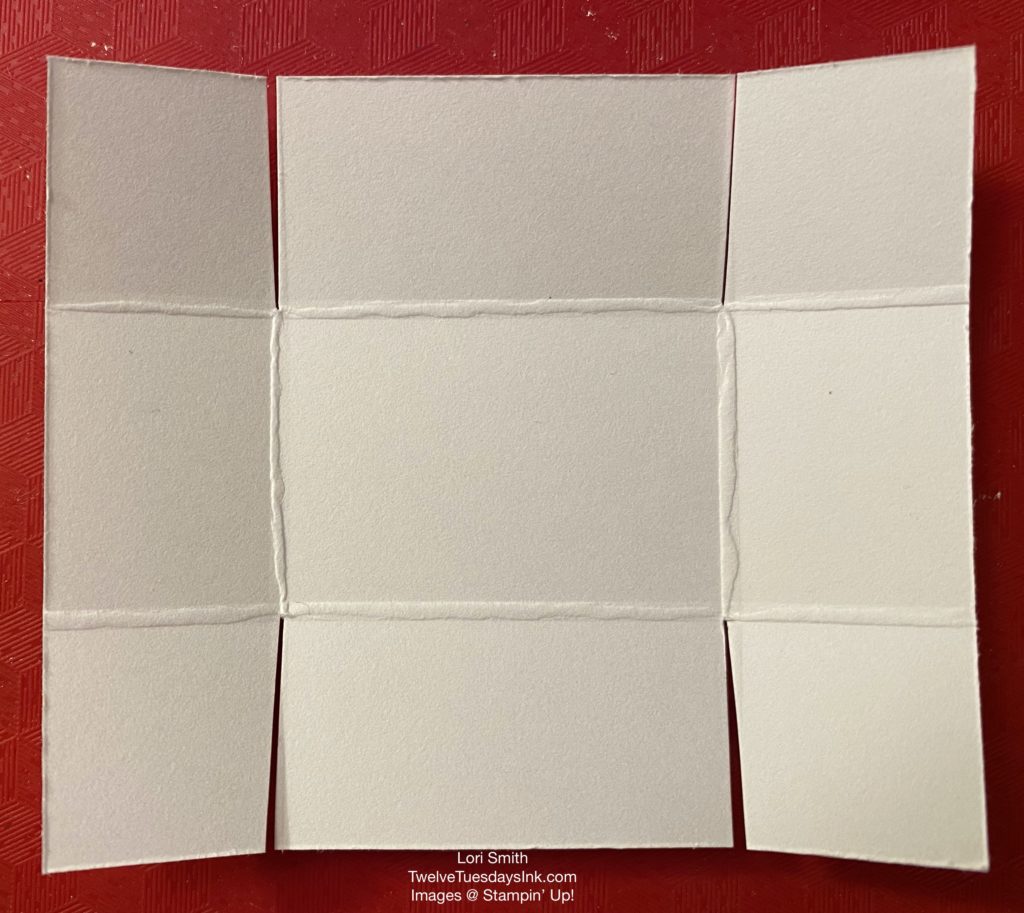
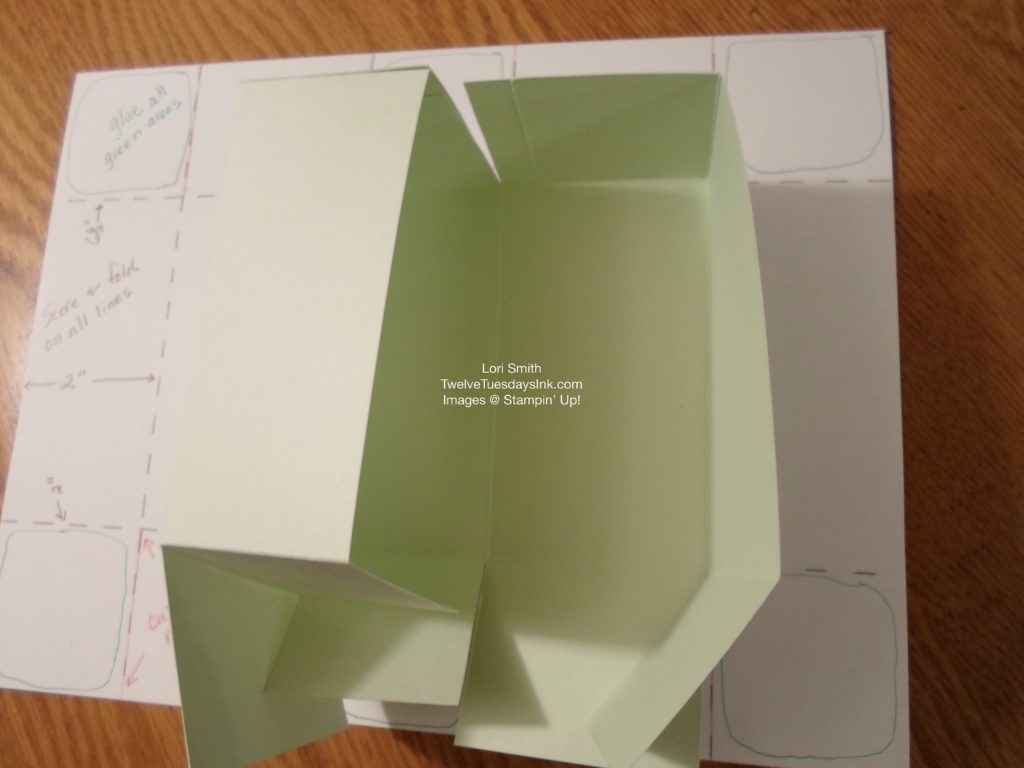
I don’t always like to cut paper and have another scrap lying around. So as a result, I came up with a gift box idea that uses one sheet of 8 1/2″ x 11″ cardstock and some glue. When glued, this box has dimensions measuring 2 1/2″ wide x 4 1/2″ long and 2″ deep. I’ve illustrated the scoring, folding, cutting, and gluing areas on the copy paper, and you can use it as a guide to construct your own box.
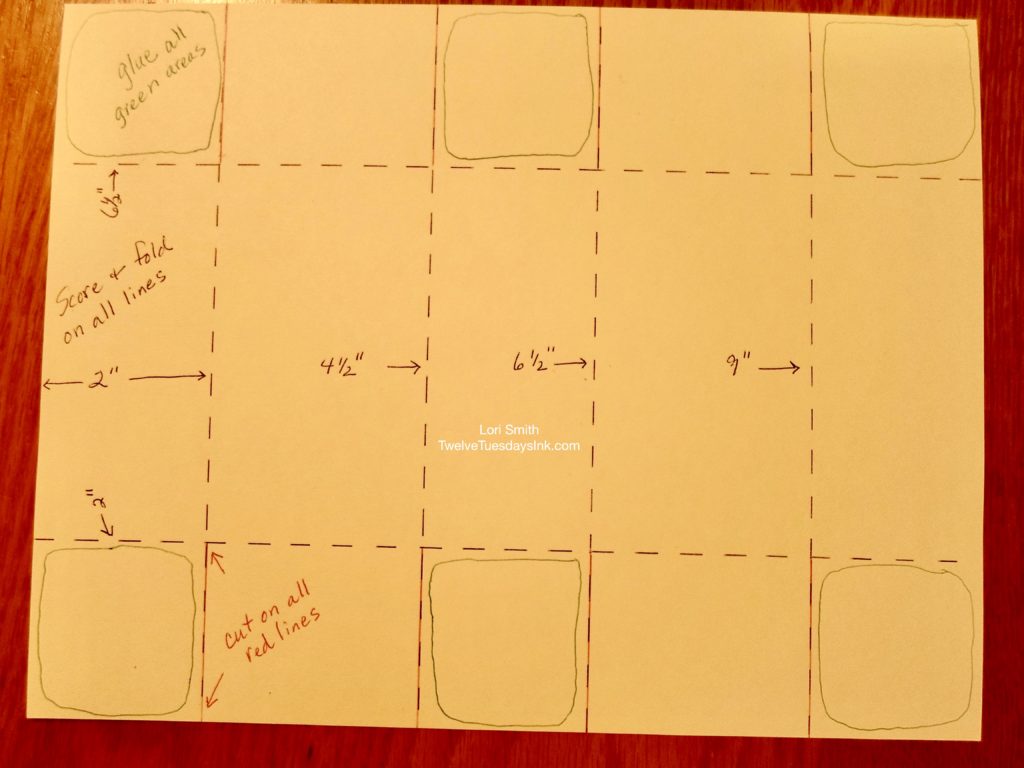
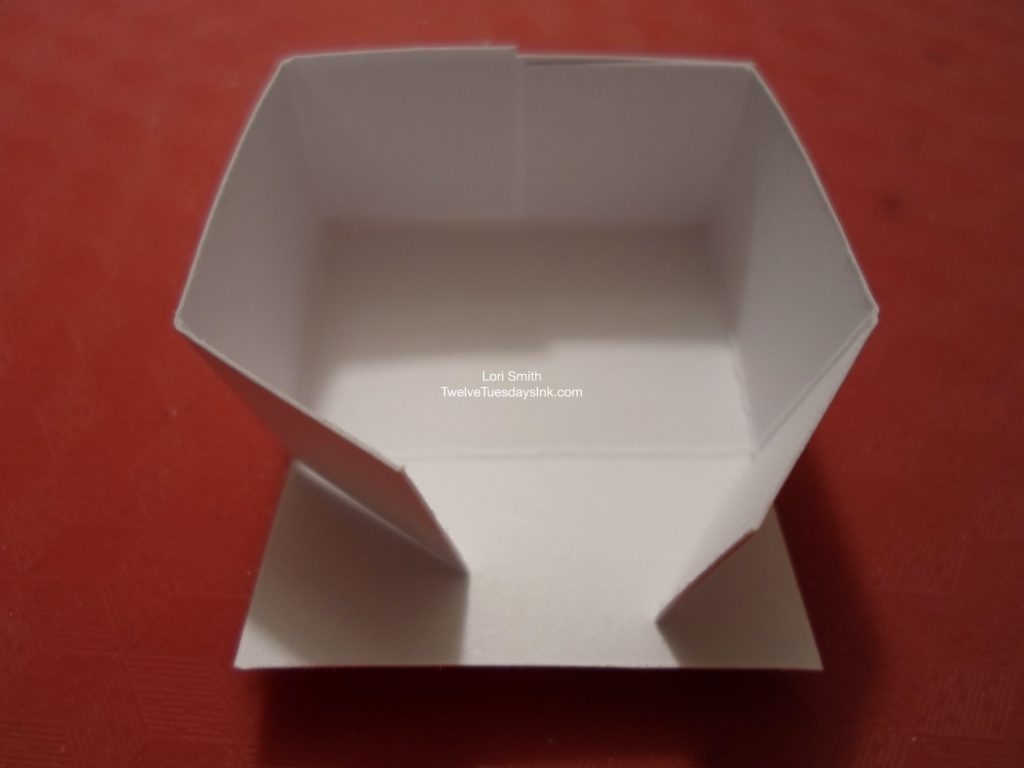
In the next photo you can see how I started to “liquid” glue the sides of the box together. The left side is the base and the right side is the lid of the box, and when complete, it opens and closes similar to a pizza box container.
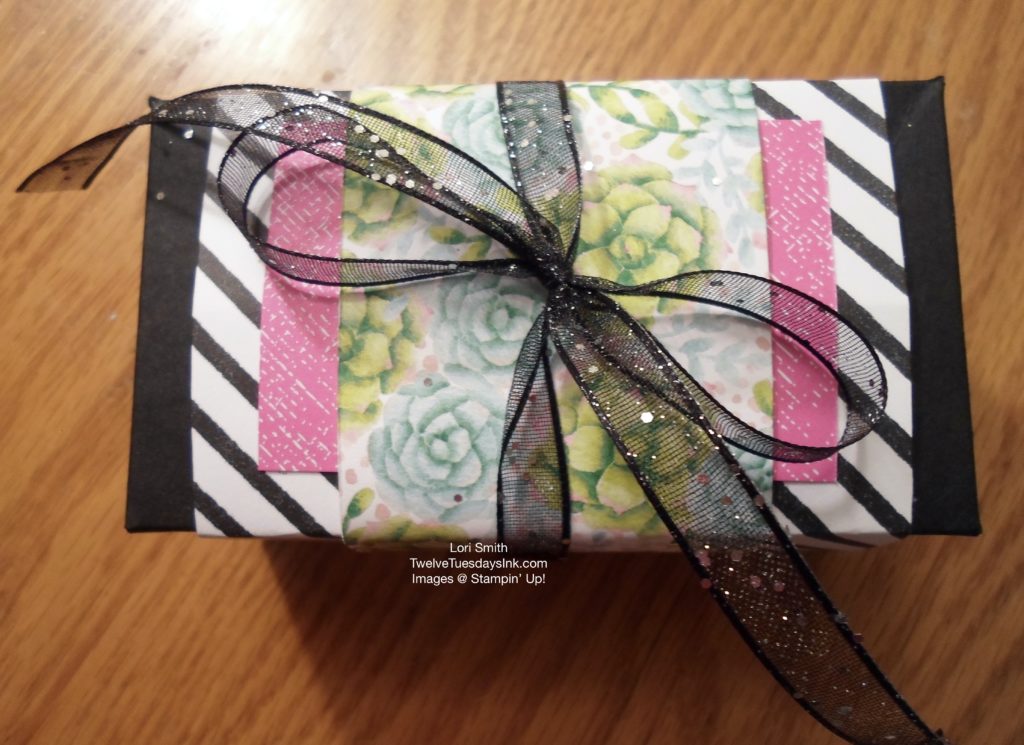
Embellish the box with a belly band and bow using DSP scraps you have, and if desired, a little tag can be added around the bow, later. I made the belly band, so it can easily slide on and off the box, when you want to open it. Here is a finished one.
Just to give you an idea of the box size, my friend Geri said she would like to get this box with a “Rolex” inside! Oh, “Santa Baby” . . . Ha! Ha! Ha! Or should I say, “Ho!, Ho! Ho!”?
Try one or two of these ideas to make for your gift giving, and then add your own extra special touches. But have fun creating whatever you choose! Contact Me if you’d like more information about stamping techniques I used for these projects.
Maybe you don’t need a box or bag for your gift? Read my post, Greeting Card & Gift Card Holder in One. It’s a great way to give a greeting card & gift card in the same envelope!
Featured Supplies:
Select the item number to view and learn more about some of the products used in this post.
- Fancy Phrases Bundle, item # 154090
- 2020 – 2022 In Color Designer Series Paper (DSP), item # 153070
- Paper Trimmer item # 152392
- Paper Snips, item # 103579
- Multipurpose Liquid Glue, item # 110755
- Tear & Tape Adhesive, item # 138995
- Seaside Spray cardstock, item # 150883
- Seaside Spray ink, item # 150085
- Basic Black cardstock, item # 121045
- Magenta Madness ink, item # 153117
- Blender Pens, item # 102845
- Granny Apple Green ink, item # 147095
- StazOn Ink, item # 101406
- Memento ink, item # 132708
- 5/8″ Polka Dot Tulle Ribbon, item # 146912
- 3/8″ Glittered Organdy Ribbon, item # 147897
Select the button below to browse the Supplies section and see previous posts about other products Stampin’ Up! has to offer.
Thanks for stopping by and checking out the fun gift and treat holders to make! Until next time . . . Have a wonderful day!