
When I saw it in the August – December Mini Catalog, the Festive Post stamp set attracted me for three reasons. It is a photopolymer stamp set, coordinates with the Rectangular Postage Stamp punch from the annual catalog, and it has images and words that can be used for multiple holidays. I’ve used the Festive Post stamp set along with other stamp sets and you can click HERE to view past posts. I have two projects, using Festive Post, that are reflective of my sense of humor. One prepared for our October Mystery Card Stamp Club Zoom meeting and the other using mostly a simple stamping technique. See how the Festive Post set is for the holidays and more!
Festive Post Mystery Card
I realize the deer image can be used for Christmas greetings, but it immediately reminded of how a deer looks when it’s running across the road. In Wisconsin, deer are very active this time of year, and in October and November are various deer hunting seasons for bow and gun. While I was growing up, deer hunting season was also a family gathering time, especially in November. We looked forward to it. My dad and uncle, brother and cousins were all hunters. After they brought their prizes home, it was time cut up and process the venison. Everyone helped, whether you were out in the woods hunting or not. And any one of them would have loved to have bagged this 14 point buck!
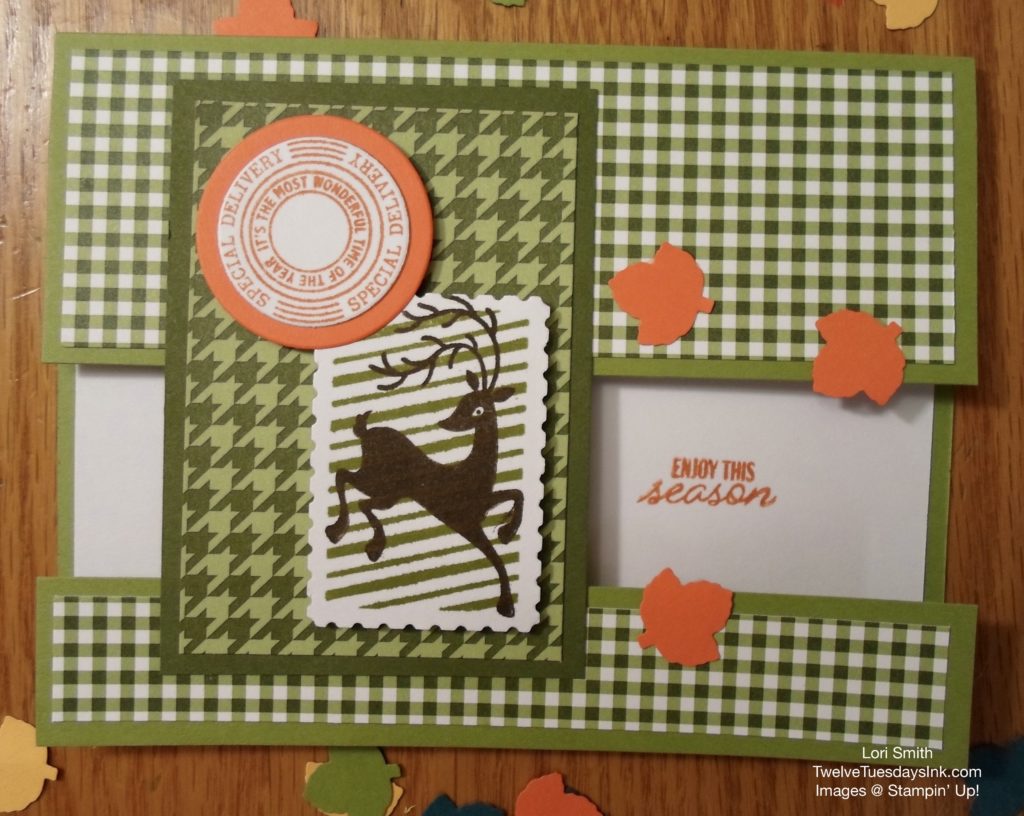
This card base design was inspired by a fellow demonstrator, Lorraine Tierney at Chat’n’Craft Creations. Check out her blog and Facebook page. Lorraine used this as a mystery card this past Spring. So, thank you for the idea, Lorraine! It’s such a versatile layout!
Below are the instructions to put together the card design’s layout. How you choose to embellish it, with sentiments and images, is your choice.
Make This Card Base Design!
Step 1:
Gather and cut the following:
- Two pieces of same-colored cardstock (CS); one piece measuring 5 1/2″ x 6 1/4″ and the other measuring 5 1/2″ x 1″
- One piece of white CS measuring 5 1/4″ x 4″, for the inside of the card
- Two pieces of Designer Series Paper (DSP): one piece measuring 5 1/4″ x 3/4″ and the other measuring 5 1/4″ x 1 3/4″
- One piece of coordinating color CS measuring 3 1/2″ x 2 1/2″
- One piece of coordinating DSP measuring 2 1/4′ x 3 1/4″
- Have extra white CS pieces for your choice of images and sentiments
- Choose a stamp set or two, to include images and sentiments
- Coordinating ink pads or color tools
- Embellishments (ribbon or bling) of your choice
- Adhesives, trimmer, scissors, punches, dies, etc. needed too
Step 2:
Score the 5 1/2″ x 6 1/4″ piece of CS, on the long side, at 2″ and then fold. One side of the score mark should then measure 2″ x 5 1/2″ and the other side should measure 4 1/4″ x 5 1/2″. Fold along the score line.
Step 3:
Adhere all DSP pieces to CS. Refer to photo, above, as a guide.
- Adhere the 5 1/4″ x 1 3/4″ DSP to the 2″ x 5 1/2″ area of the CS you just scored, in step 2.
- Glue the 5 1/4″ x 3/4″ DSP to the 5 1/2″x 1″ CS piece.
- Adhere the 2 1/4″ x 3 1/4″ DSP to the 2 1/2″ x 3 1/2″ CS piece.
Step 4:
Assemble the card base.
- Fold the 2″ flap again to form the top part of the (landscape) card front, then align and hold the 1″ DSP/CS strip to the bottom of the card base without gluing anything at this point. You want the card to open from the bottom.
- While holding the 1″ strip in place, position and align the 3 1/2″ x 2 1/2″ DSP/CS piece where you’d like to adhere it. I recommend adhering the 3 1/2″ x 2 1/2″ piece to the 1″ strip first, then gluing the top of the 3 1/2″ x 2 1/2″ DSP/CS piece to the 2″ flap last.
- Alternate idea! Position the fold to the left and glue the 3 1/2″ x 2 1/2″ DSP/CS piece portrait style, so that the card will open from the right, not the bottom.
Congratulations! You have the card base completed! Use your choice of stamp and sentiment images, then embellish the card your way.
Simple Festive Post Holiday Tree
Here’s a fairly simple idea for a card to depict cutting your own Christmas tree. Many people enjoy driving to a tree farm, then choosing and cutting their own Christmas tree. Soon, we will all be driving past these farms and seeing the holes in fields, left by these selections. Can you find the empty spot in this tree-line?
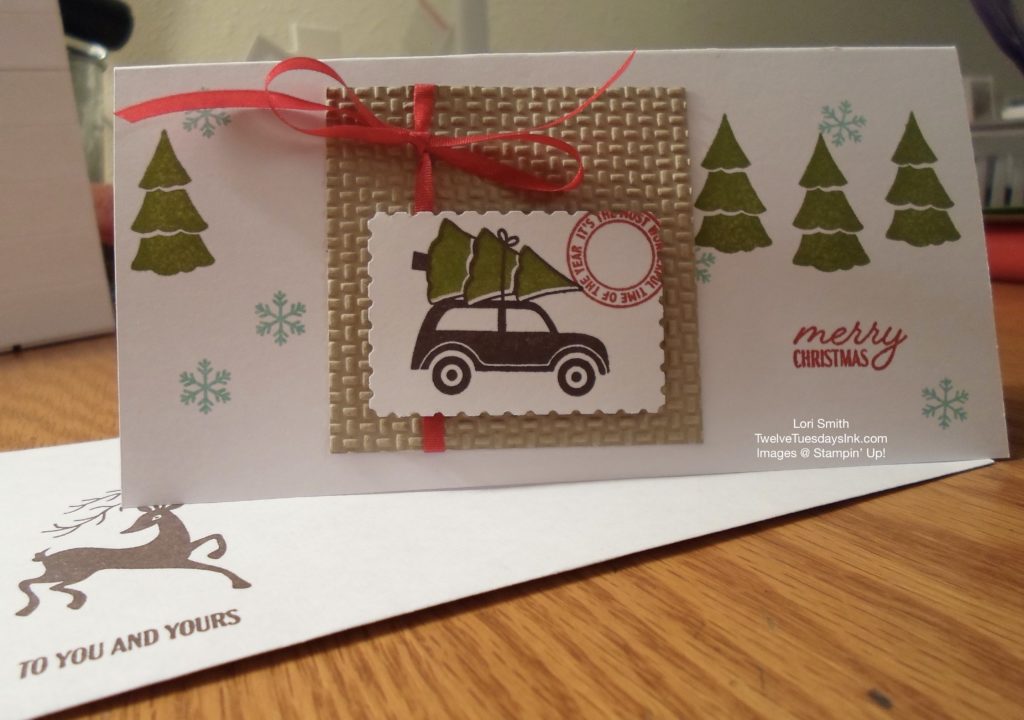
This is Lori’s version of a slim line card. The card is a 6″ x 6″ piece of cardstock that is scored at 3″ (in half), then folded, so the card front measures 6″ x 3″. As a result, one 12″ x 12″ sheet of cardstock can make four cards. I love this size card, because it fits wonderfully inside a standard #6 3/4 small business envelope.
I can also see using this stamp set to make a scrapbook page. Then, just add the photos taken during your tree excursion!
My dad will be the recipient of the deer card. I hope it brings him some good memories. And I hope these ideas inspire more ideas for you, and how you can use the Festive Post set for the holidays and more!
Featured Products
Select the item number below to view and learn about the products used here.
- Festive Post stamp set, item # 153460
- Posted for You Bundle, item # 154075
- Heartwarming Hugs DSP, item # 153492
Thank you for visiting Festive Post for the Holidays & More! Come back anytime!
I love this card! This card and your newest post make me want that stamp set! Also, this card reminds me of the National Lampoon’s Christmas movie!
I hadn’t thought of the movie, but it would be right in line with that. Heeheee!