
This past week I made a couple of gift card holders for two of my younger grandchildren’s birthdays. They are both old enough and enjoy shopping for their own gifts. One sheet of the Playing with Patterns paper is the perfect size to make a DSP gift card holder.
This first gift card holder I made was for my granddaughter, using an older Sizzix die, and one 6″ x 6″ Playing with Patterns DSP sheet. After assembling the cardholder base, I embellished it with punch art, by using the Lovely Labels Pick A Punch and a retired heart punch. Then I added a bow. Because I made this card a while ago, and stopped before I finished the inside, I got a chance to use some great sentiments from A Grand Kid stamp set. One card, done!

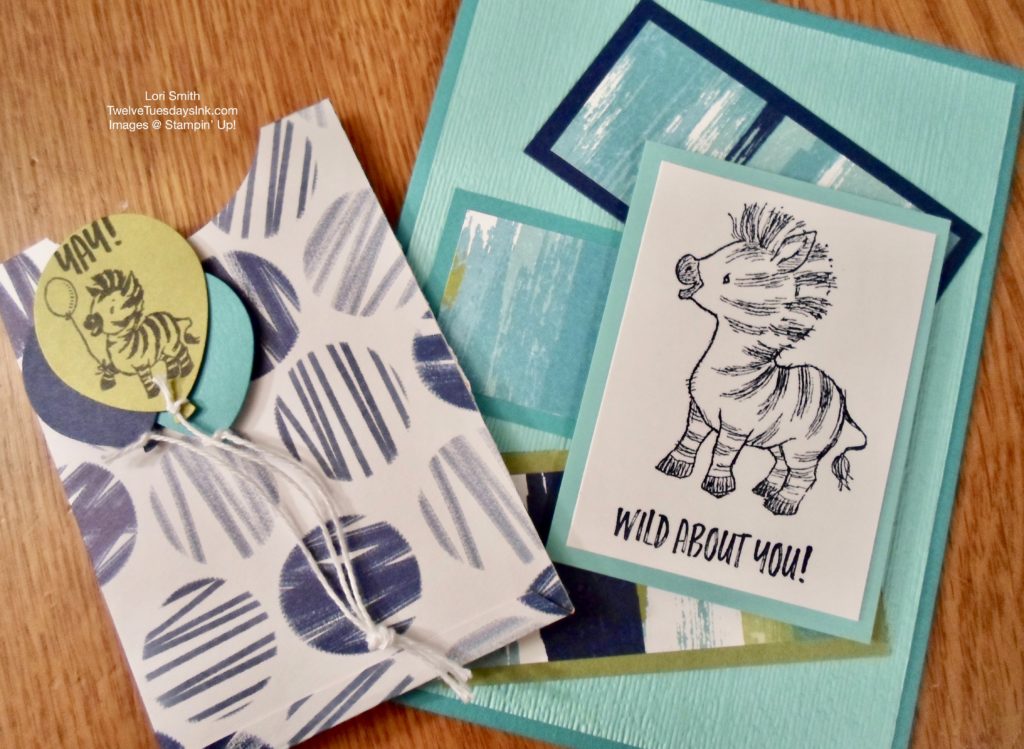
When it came to making the gift card holder for my grandson, I realized I didn’t want to see the reverse side of the DSP and needed to come up with a way to accomplish this. Here is the gift card holder I made, and not too fancy, either. (smile)
Make the gift card holder:
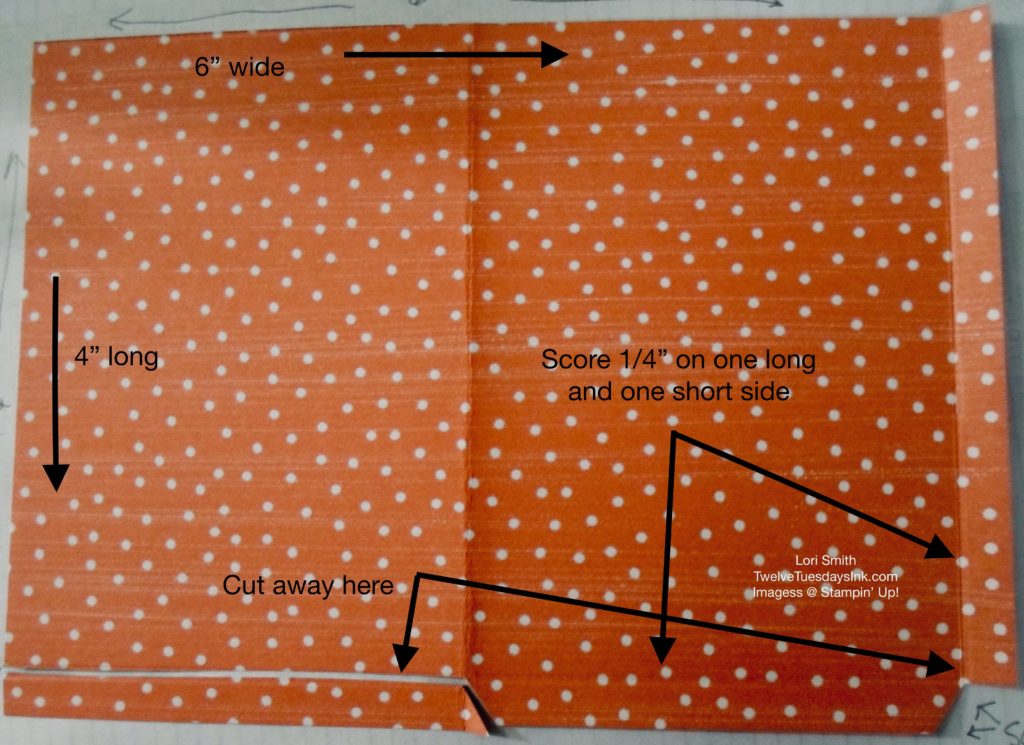
- Select a sheet of DSP (or a piece of cardstock) and cut it to measure 6″ x 4″. Use the photo below to help guide you.
- Score at 1/4″ along one 6″ side and one 4″ side.
- Fold along both score lines, then open the paper up again. Use a bone folder to help with making crisp creases. This helps to define the score lines for the next step.
- Bring the 4″ edge of paper, not scored, over to meet the opposite side at the 4″ score line, press and fold. The folded section should measure 2 7/8″ wide.
- Open all the folds and cut away the small quarter inch square corner, where the two score lines are intersecting. Throw it.
- Also, cut away the 2 7/8″ x 1/4″ strip as shown in the photo below. Toss it. At this point, there will be two 1/4″ flaps left, a long flap on the side of the paper, and a small flap on the bottom.
- Fold over the long flap that measures 3 3/4″ x 1/4″, then adhere white liquid glue or tear & tape adhesive to the outside of the paper within the 1/4″ margin. The flap should be between the front and back of the card holder, making a small sleeve, with 2 open ends.
- Next, with the sleeve laying flat, add adhesive to the bottom flap, inside, and fold up to adhere it to the outside of the paper. This closes the bottom of the cardholder and makes a pocket.
- Use a circle punch, to punch a small curve at the open end of the pocket, for ease in sliding the gift card in and out of the holder.
- Optional: Embellish the outside of the holder to fit the occasion.
12 Tuesdays Tip: Practice with a piece of copy paper first. You don’t have to waste adhesive on it, but can get a pattern cut out and folded, to understand how it comes together before cutting and adhering the paper you really want use.
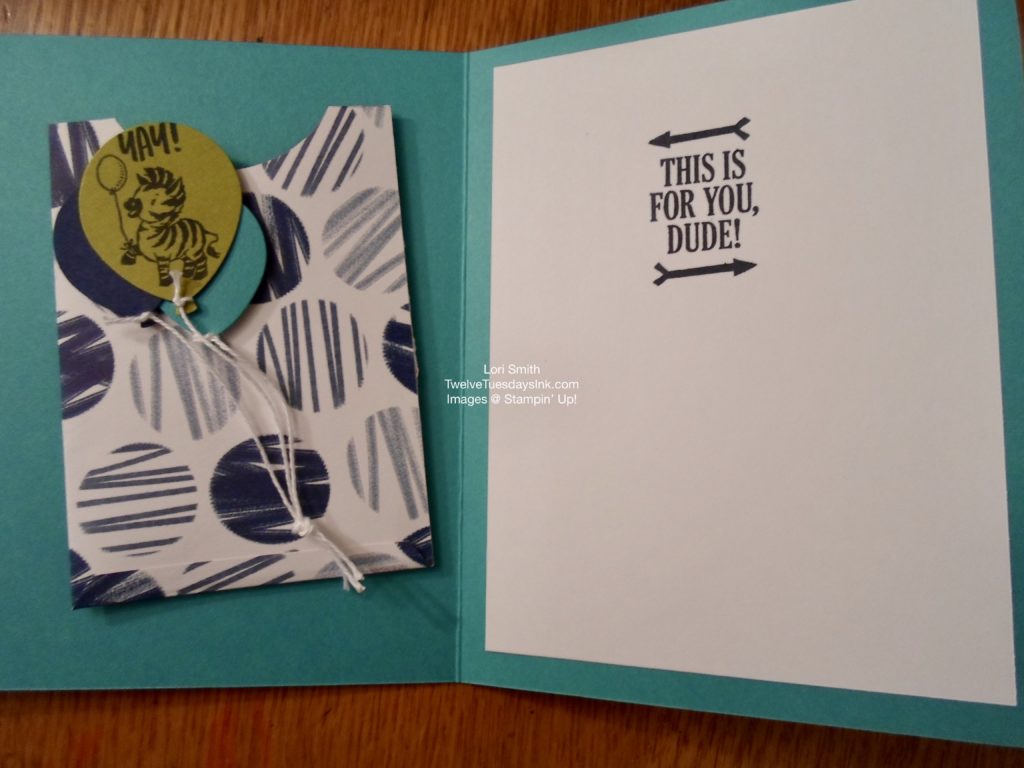
For my grandson’s gift card holder, I used the 2″ Circle and Balloon Bouquet punches. Then I added kite string to the balloons. The largest balloon is the perfect size to fit the little zebra image from the Celebration of Tags stamp set. The sentiment for his card comes from the same stamp set.
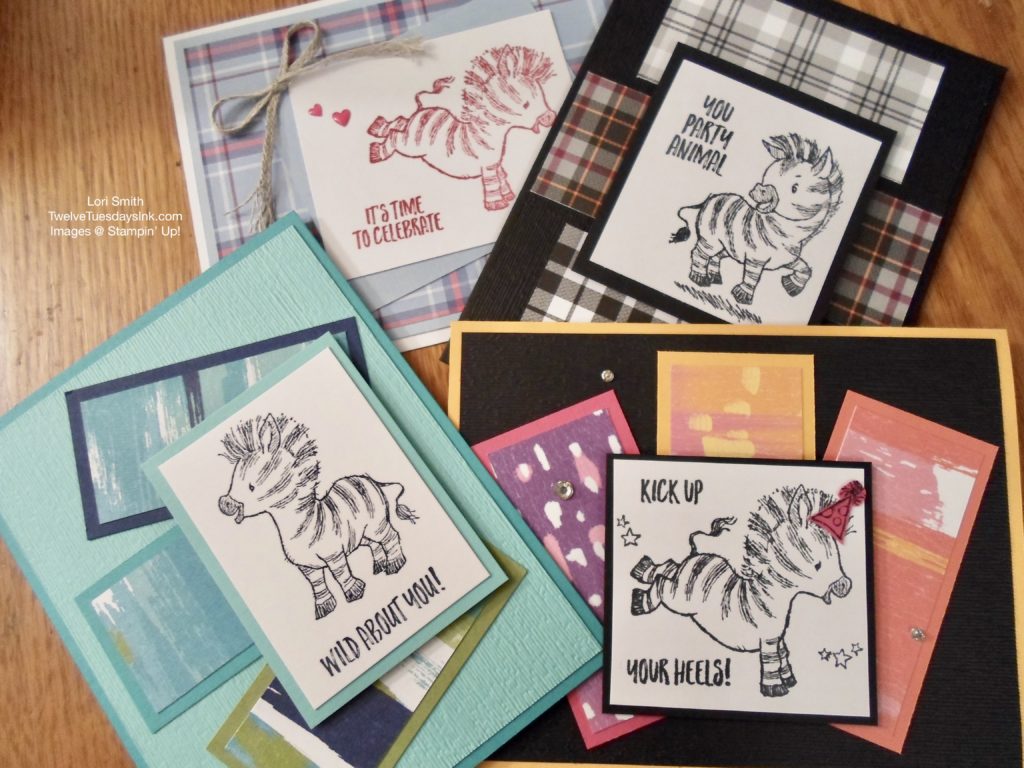
Below are some other birthday cards I made with the Zany Zebras stamp set, Artistry Blooms DSP and Plaid Tidings DSP.
Making customized gift card holders is not hard. I hope you give it a try!
Supplies List:
Click on the item # to view and learn details of some of the products featured in this post.
- Playing with Patterns 6″ x 6″ DSP, item # 152490
- Paper Trimmer, item # 152392
- Bone Folder, item # 102300
- Paper Snips, item # 103579
- Multipurpose Liquid Glue, item # 110755
- Tear & Tape Adhesive, item # 138995
- 2″ Circle Punch, item # 133782
- Zany Zebra stamp set, item # 152536
- Clear Block D, item # 118485
- A Grand Kid stamp set, item # 152500
- Celebration of Tags stamp set, item # 153307
- Artistry Blooms DSP, item #152495
- Plaid Tidings DSP, item # 153527
Use the SHOP NOW button to find choices of embellishments through the current catalogs in my online store.